As the crisp autumn air settles in and leaves turn vibrant shades of red and gold, it’s the perfect time to embrace the season’s creativity with pumpkin decorating. Pumpkins are not just for carving anymore; they’re a canvas for imagination!
In this guide, we’ll explore 50 pumpkin decorating ideas, ranging from sweet to spooky, that you can try this year. Whether you’re crafting with kids, hosting a Halloween party, or simply looking to add some festive flair to your home, there’s something here for everyone.
1. Crafting Tip: Choose the Right Pumpkin
Selecting the right pumpkin is the first step to successful pumpkin decorating.
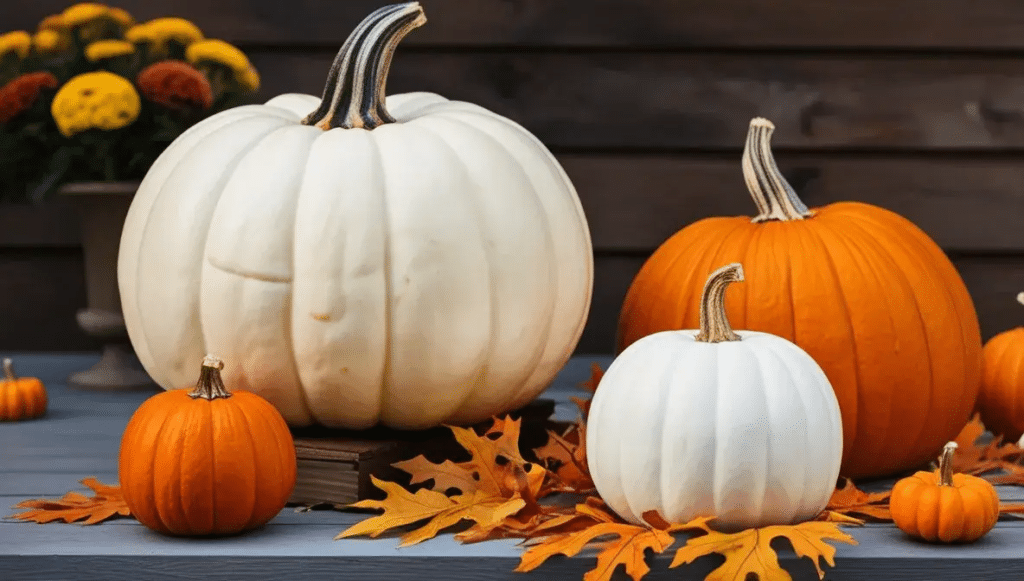
Here are some tips to help you find the perfect pumpkin:
- Look for Firmness: Ensure the pumpkin feels solid and heavy for its size without any soft spots.
- Check for Blemishes: A smooth, blemish-free surface allows for better painting and decorating.
- Choose the Right Size: Mini pumpkins are great for intricate designs, while large ones serve as fantastic statement pieces.
Types of Pumpkins
| Type | Description | Best For |
|---|---|---|
| Classic Orange | Traditional, sturdy | Carving, painting |
| White Pumpkin | Smooth and elegant | Modern designs |
| Mini Pumpkins | Cute and versatile | Table centerpieces |
| Specialty Varieties | Unique shapes and colors | Creative projects |
2. Emoji Pumpkin
Pumpkin decorating can be playful with emoji pumpkins! They’re perfect for families and kids who enjoy the colorful, expressive world of emojis.
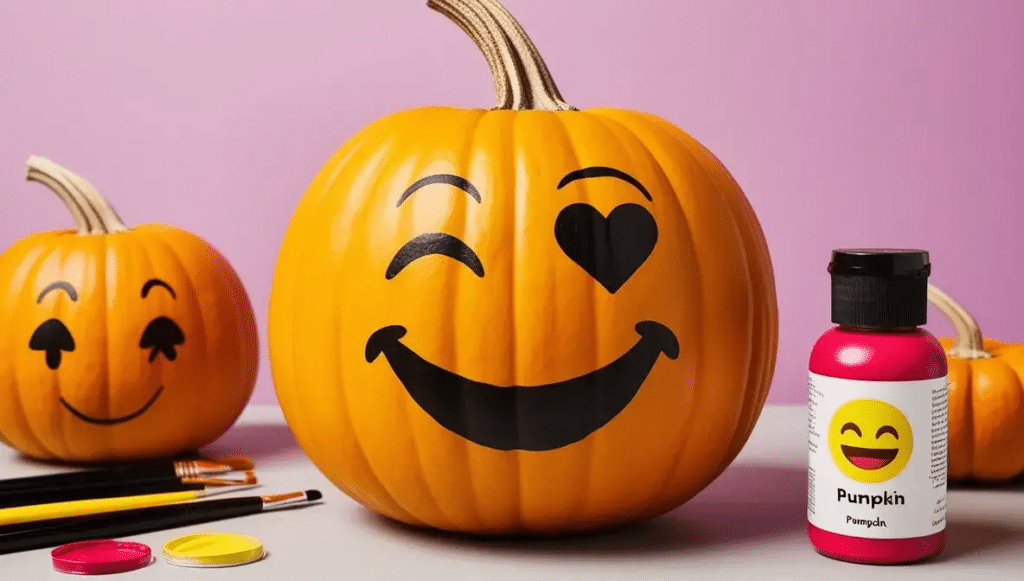
Steps to Create an Emoji Pumpkin:
- Select Your Emoji: Choose an emoji that resonates with you or your family—whether it’s a smiley face, heart, or silly face.
- Sketch the Design: Lightly sketch the emoji onto the pumpkin with a pencil.
- Paint: Use acrylic paint to fill in the emoji. Bright colors work best to capture the fun essence of emojis.
Materials Needed:
- Pumpkin
- Acrylic paint (yellow, black, red, etc.)
- Paintbrushes
3. Spider Pumpkin
Transform a plain pumpkin into a spooky spider pumpkin that’s perfect for Halloween! This design is simple yet effective for pumpkin decorating.
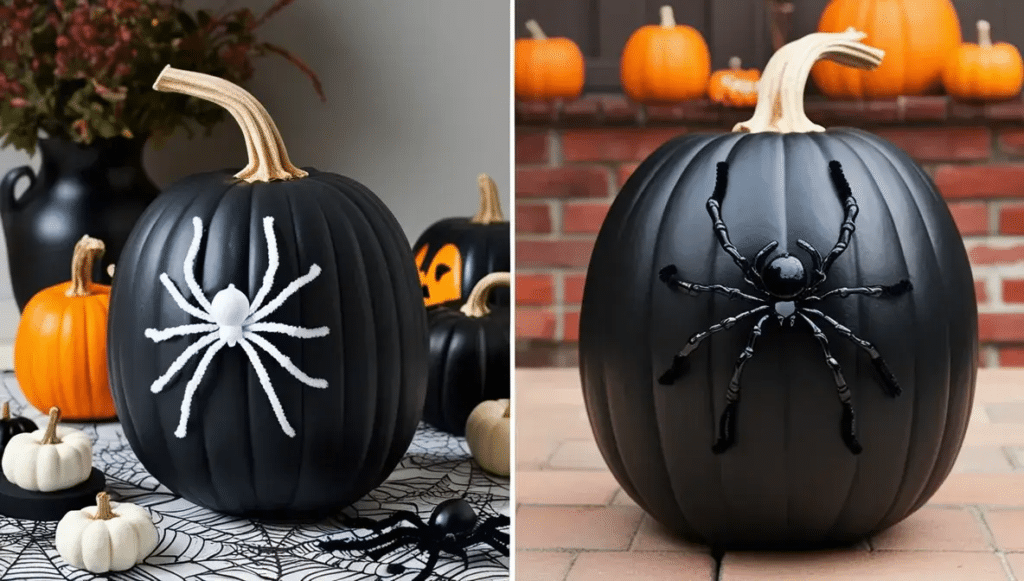
Steps to Create a Spider Pumpkin:
- Paint the Pumpkin Black: Use black acrylic paint to cover the pumpkin entirely.
- Add Spiders: Glue plastic spiders onto the pumpkin. You can also use black pipe cleaners for legs, attaching them to the base of the pumpkin.
Materials Needed:
- Pumpkin
- Black paint
- Plastic spiders or pipe cleaners
4. Word Art Pumpkin
A word art pumpkin allows you to personalize your decoration with a fun phrase or word that captures the season’s spirit.
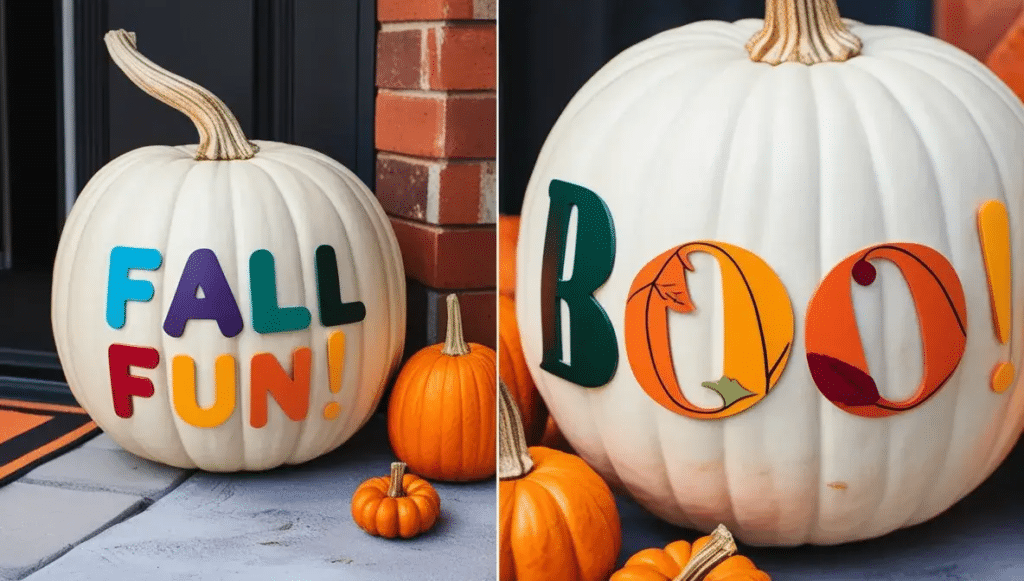
Steps to Create a Word Art Pumpkin:
- Choose a Phrase: Decide on a short phrase like “Boo!” or “Fall Fun.”
- Letters: Use letter stickers or paint to create your design. Consider using different colors for each letter for added flair.
Materials Needed:
- Pumpkin
- Letter stickers or paint
5. Fabric Fox Pumpkin
Add a touch of whimsy to your decor with a fabric fox pumpkin! This design is especially charming for those who love woodland themes.
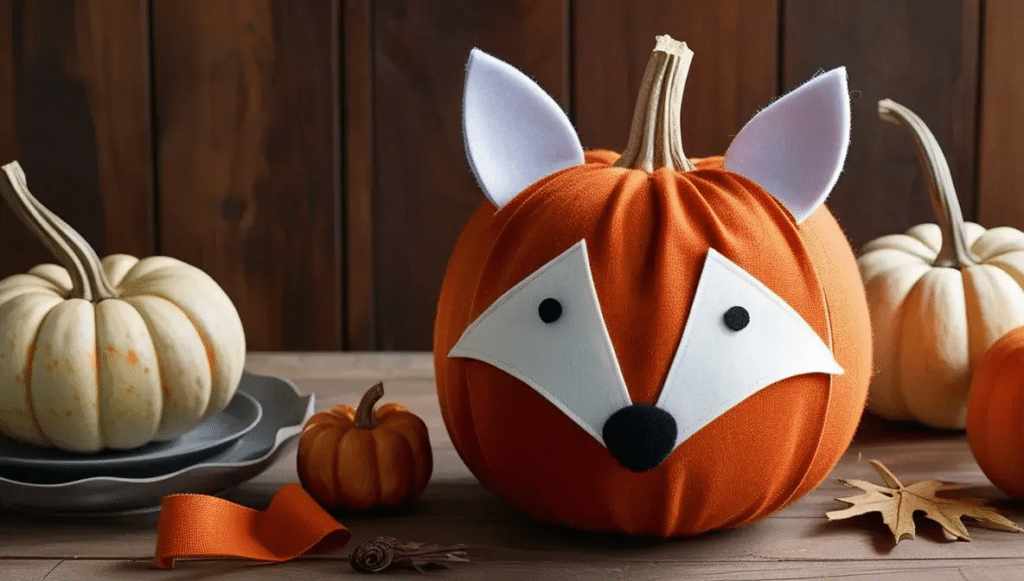
Steps to Create a Fabric Fox Pumpkin:
- Wrap the Pumpkin: Use orange fabric to cover your pumpkin.
- Create Ears and Face: Cut out ear shapes from felt or cardstock and glue them on top. Use felt for the eyes and nose.
Materials Needed:
- Pumpkin
- Orange fabric
- Felt
6. Goofy Face Pumpkin
Bring some laughter into your home with a goofy face pumpkin. This is a great way to engage kids in the decorating process.
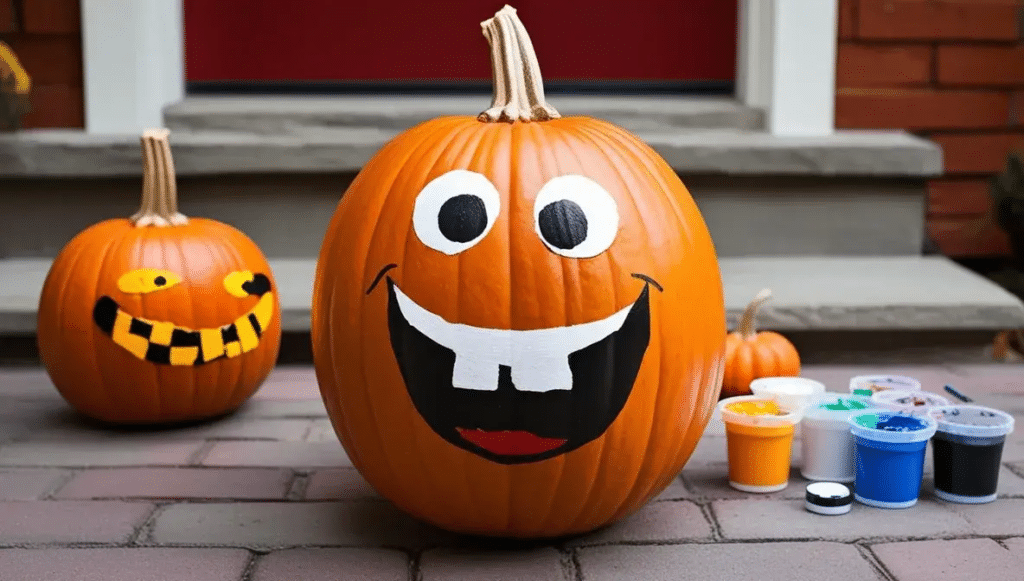
Steps to Create a Goofy Face Pumpkin:
- Choose Your Expression: Decide on a silly face, like a big smile or crossed eyes.
- Paint and Add Accessories: Use paint for the mouth and eyes, and add googly eyes or other embellishments for a goofy effect.
Materials Needed:
- Pumpkin
- Paint
- Googly eyes
7. Doily Pumpkin
For a vintage touch, try a doily pumpkin. This design adds an elegant feel to your fall pumpkin decorating.
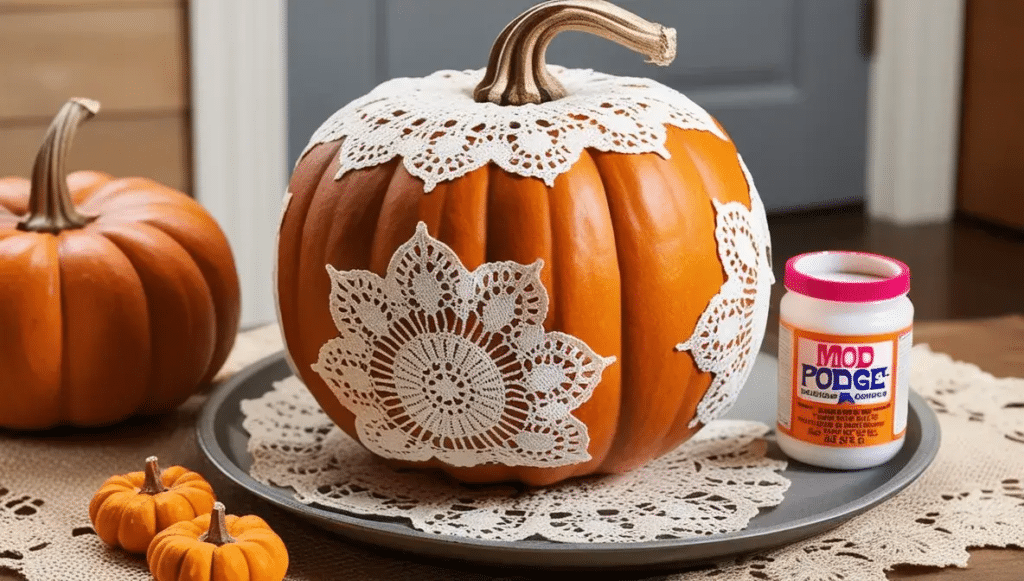
Steps to Create a Doily Pumpkin:
- Adhere Doilies: Use Mod Podge to attach lace doilies to your pumpkin. Cover the entire surface for a beautiful effect.
- Seal: Once dry, add a layer of Mod Podge over the doilies to protect them.
Materials Needed:
- Pumpkin
- Doilies
- Mod Podge
8. Bedazzled Pumpkin
Get glamorous with a bedazzled pumpkin! This design is perfect for those who love all things shiny and sparkly in their pumpkin decorating.
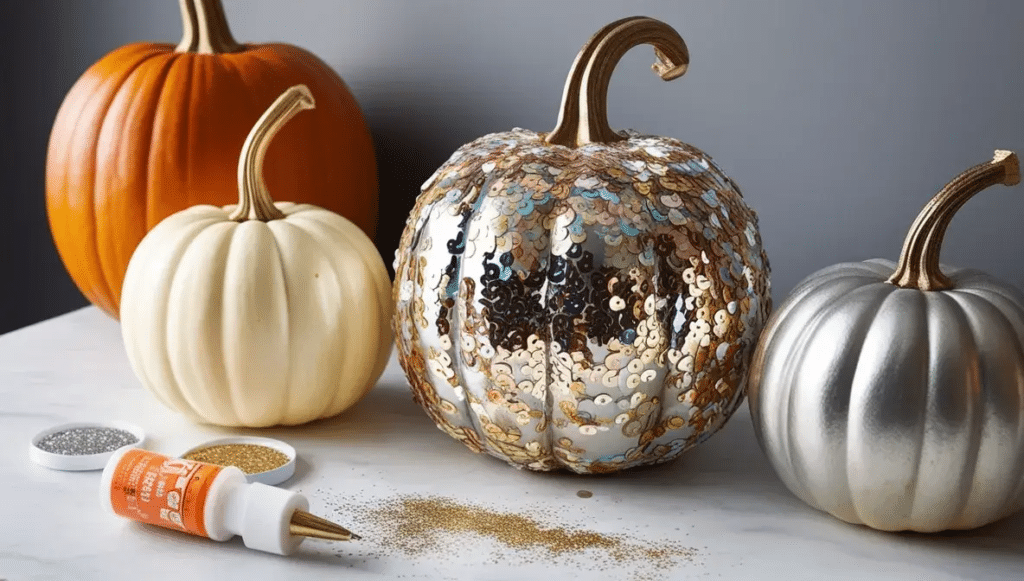
Steps to Create a Bedazzled Pumpkin:
- Paint the Base: Choose a base color for your pumpkin—consider gold or silver for a chic look.
- Add Sequins and Glitter: Use hot glue to attach sequins and sprinkle glitter over the pumpkin while the glue is still wet.
Materials Needed:
- Pumpkin
- Sequins
- Glitter
- Hot glue gun
9. Diorama Pumpkin
Unleash your creativity with a diorama pumpkin. This project allows for storytelling and is perfect for showcasing your artistic side in pumpkin decorating.
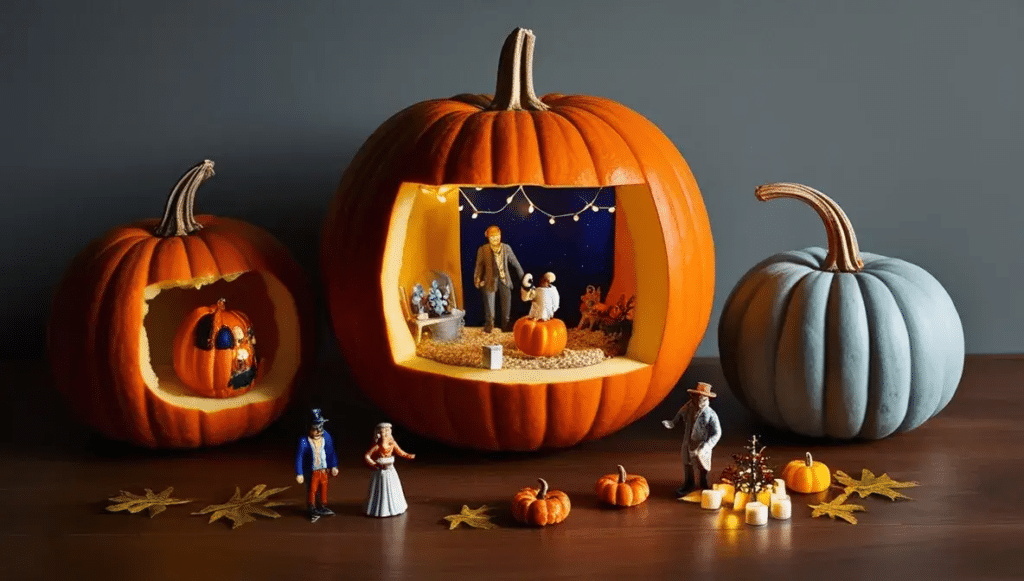
Steps to Create a Diorama Pumpkin:
- Hollow Out the Pumpkin: Cut off the top and scoop out the insides.
- Create a Scene: Use small figurines, decorations, and even lights to create a miniature scene inside the pumpkin.
Materials Needed:
- Pumpkin
- Mini figurines
- Decorations
10. Monster Pumpkin
Turn your pumpkin into a friendly monster! This design is great for kids and adds a playful element to your pumpkin decorating.
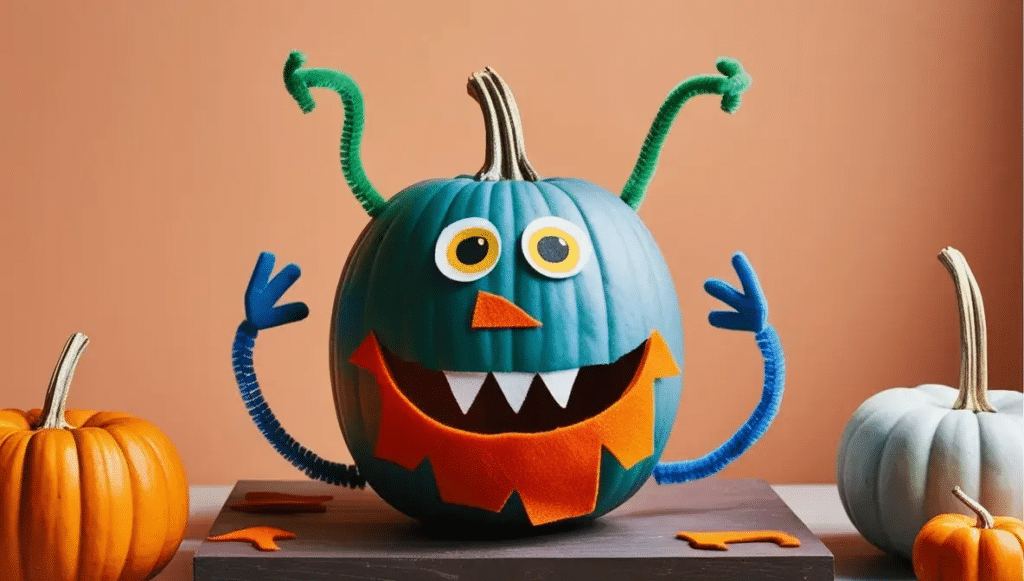
Steps to Create a Monster Pumpkin:
- Paint the Pumpkin: Choose bright colors for your monster.
- Add Features: Use felt for eyes and teeth, and pipe cleaners for arms or antennas.
Materials Needed:
- Pumpkin
- Paint
- Felt
- Pipe cleaners
11. Matisse-Inspired Pumpkin
Channel your inner artist with a Matisse-inspired pumpkin. This design is perfect for art lovers who want to incorporate their passion into their pumpkin decorating.
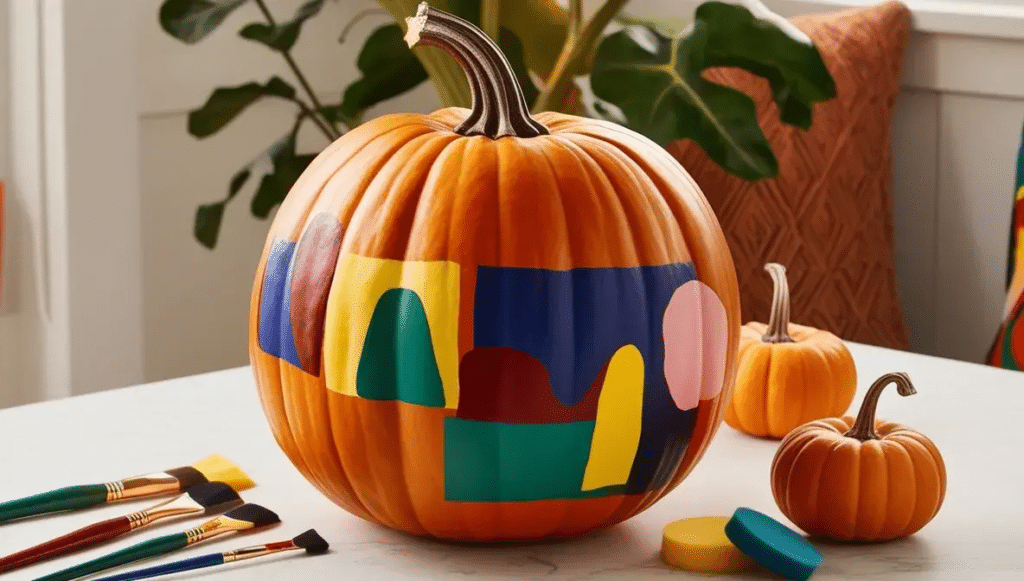
Steps to Create a Matisse-Inspired Pumpkin:
- Choose Bold Colors: Use vibrant paints to reflect Matisse’s iconic style.
- Add Shapes: Create abstract shapes using brushes or sponges.
Materials Needed:
- Pumpkin
- Paint
- Brushes
12. Grumpy Cat Pumpkin
Pay tribute to the internet’s favorite cat with a grumpy cat pumpkin. This design is sure to bring smiles and laughter to your pumpkin decorating.
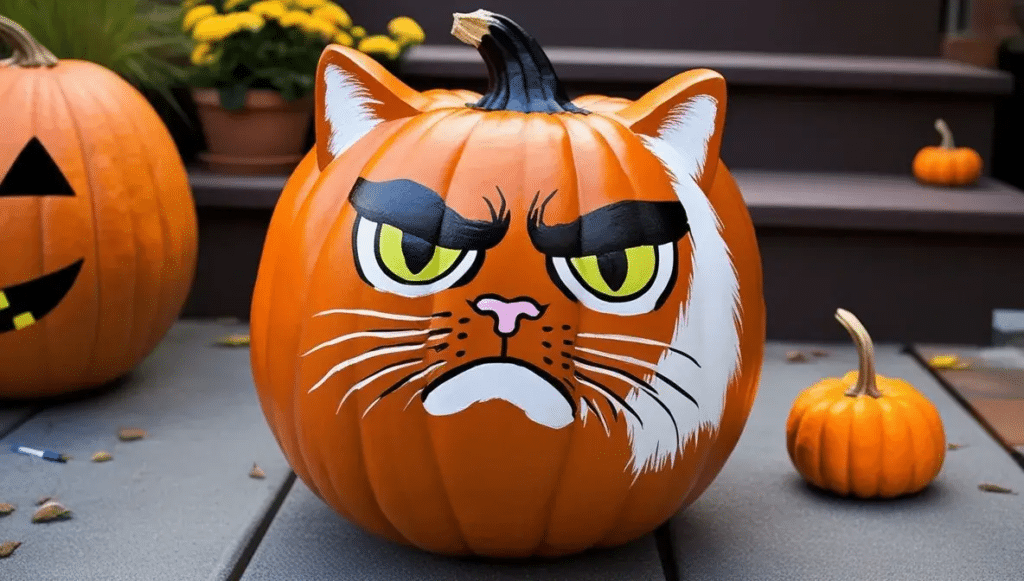
Steps to Create a Grumpy Cat Pumpkin:
- Paint the Base: Use a light color as the base for fur.
- Add Features: Paint the grumpy face and add text with funny phrases.
Materials Needed:
- Pumpkin
- Paint
13. Cactus Pumpkin
Add a unique twist to your pumpkin decorating with a cactus pumpkin. This design is fun and unexpected.
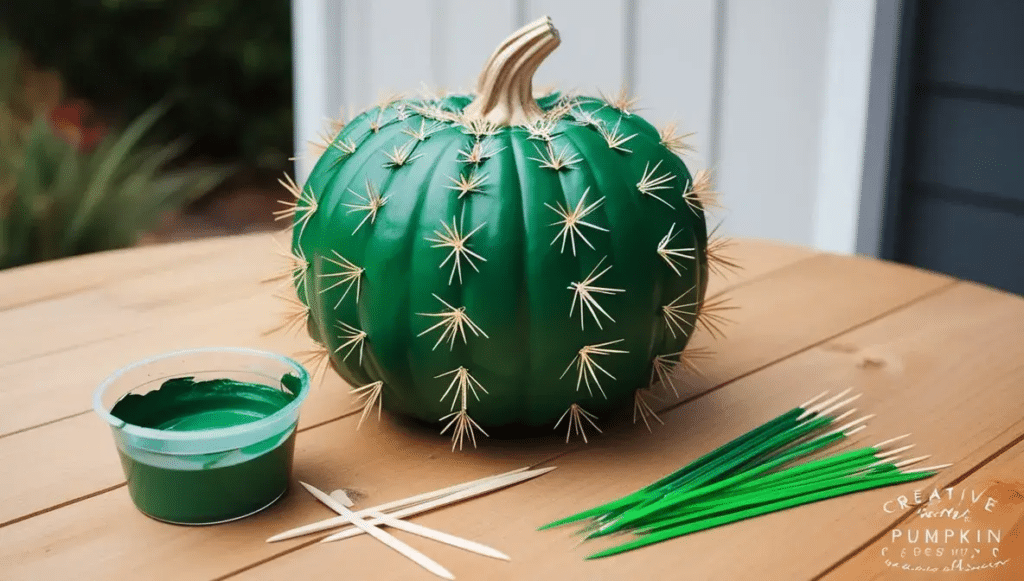
Steps to Create a Cactus Pumpkin:
- Paint the Pumpkin Green: Cover the pumpkin with green paint.
- Add Spikes: Use toothpicks or green pipe cleaners for spikes.
Materials Needed:
- Pumpkin
- Green paint
- Toothpicks or pipe cleaners
14. Metallic Pumpkin
For a sleek and modern look, try a metallic pumpkin. This design is versatile and can be used for both Halloween and Thanksgiving pumpkin decorating.
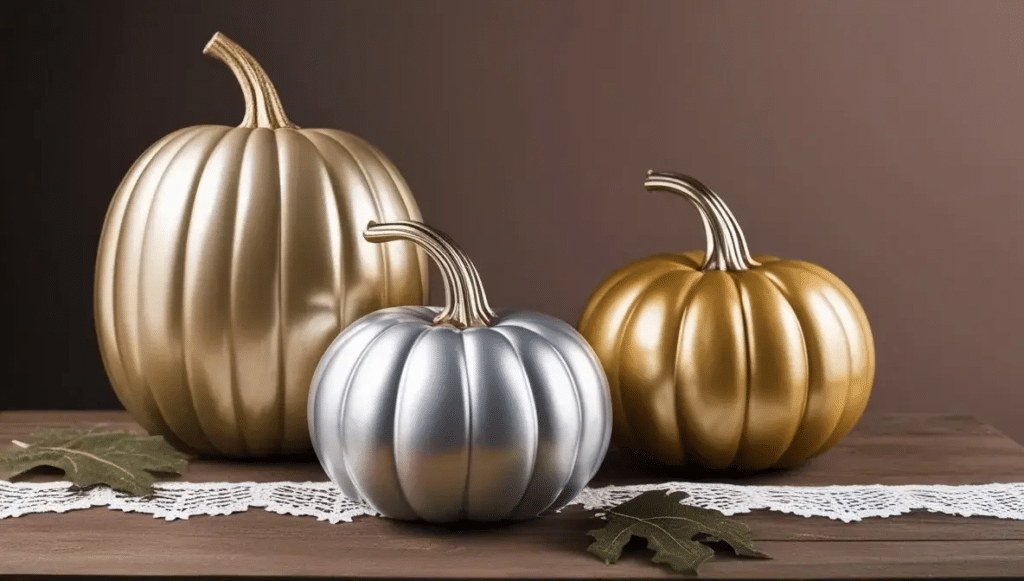
Steps to Create a Metallic Pumpkin:
- Spray Paint the Pumpkin: Choose a metallic spray paint, such as gold or silver, and cover the entire pumpkin.
- Add Details: Consider adding decorative accents like ribbon or lace for an extra touch.
Materials Needed:
- Pumpkin
- Metallic spray paint
15. Herringbone Pattern Pumpkin
Show off your crafting skills with a herringbone pattern pumpkin. This design is visually striking and a bit more advanced for pumpkin decorating.
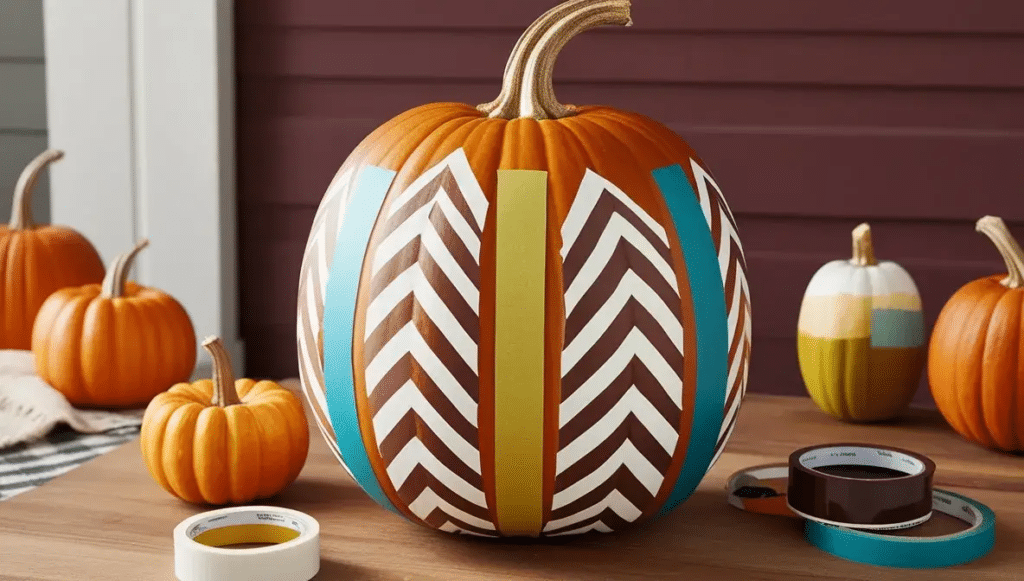
Steps to Create a Herringbone Pattern Pumpkin:
- Tape the Pumpkin: Use painters’ tape to create a herringbone pattern over your pumpkin.
- Paint: Choose contrasting colors for the pattern and remove the tape once dry.
Materials Needed:
- Pumpkin
- Painters’ tape
- Paint
16. Bat Pumpkin
A bat pumpkin is a classic Halloween design that’s both fun and easy to create in your pumpkin decorating efforts.
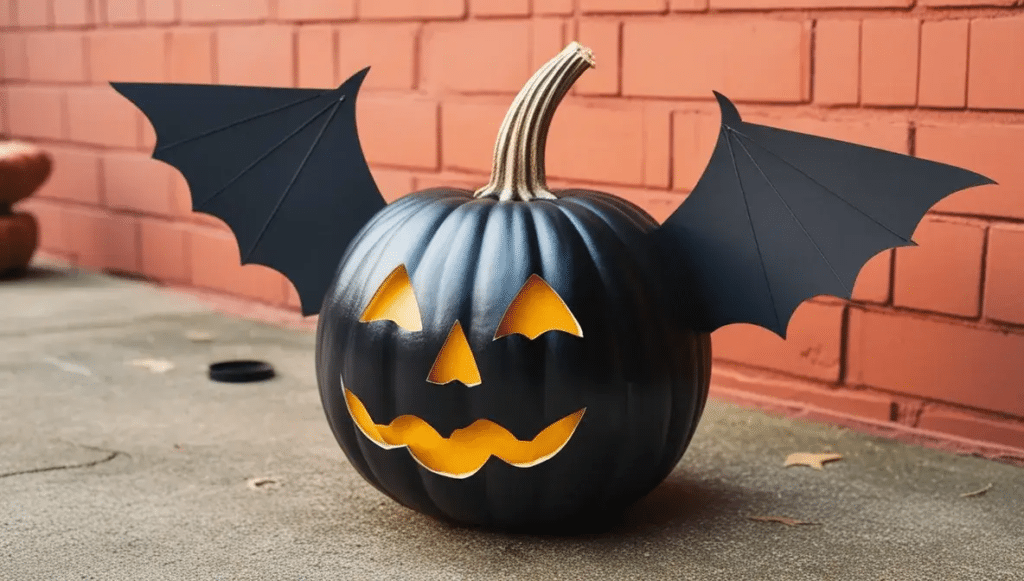
Steps to Create a Bat Pumpkin:
- Paint the Pumpkin Black: Use black paint to cover the pumpkin.
- Add Bat Wings: Cut bat wings from black construction paper and attach them to the pumpkin with glue.
Materials Needed:
- Pumpkin
- Black paint
- Construction paper
17. Wire-Wrapped Pumpkins
For a unique textural effect, try wire-wrapped pumpkins. This technique adds an artistic flair to your pumpkin decorating.
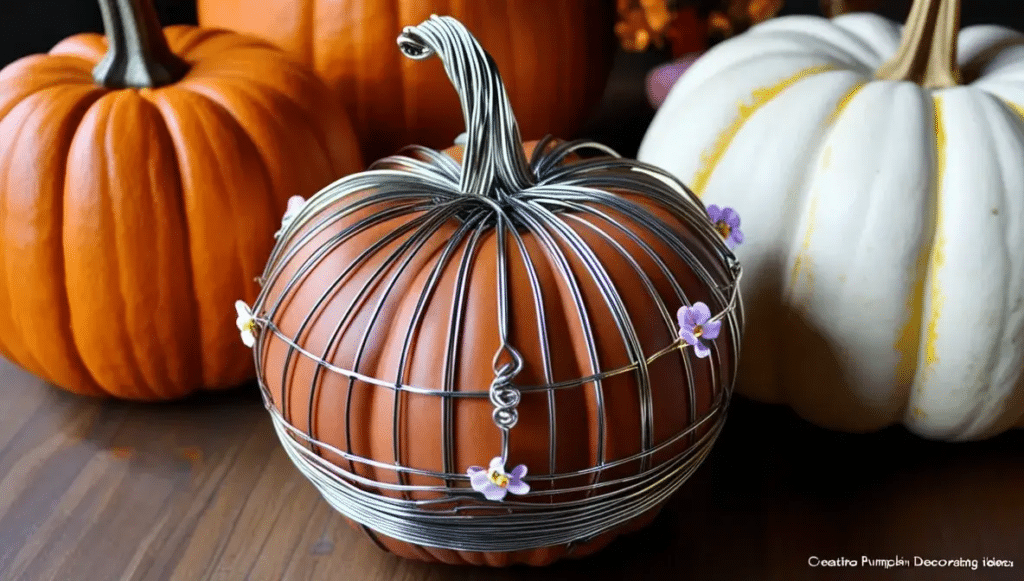
Steps to Create Wire-Wrapped Pumpkins:
- Wrap Wire: Take thin wire and wrap it around the pumpkin in various patterns.
- Add Details: Consider embellishing with beads or small flowers.
Materials Needed:
- Pumpkin
- Wire
- Beads or flowers (optional)
18. Floral Pumpkin
Embrace the beauty of nature with a floral pumpkin. This design brings a fresh and vibrant touch to your decor.
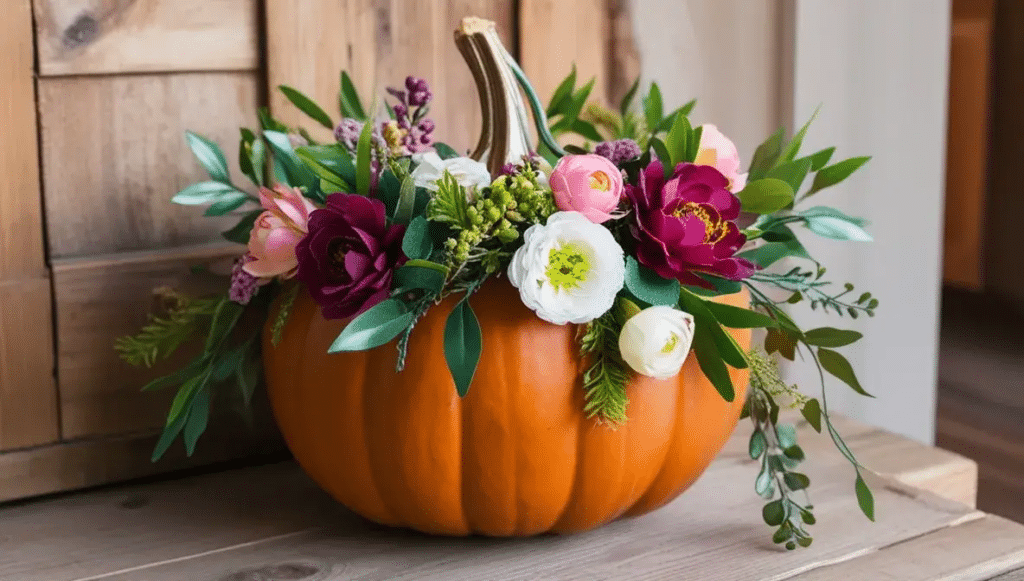
Steps to Create a Floral Pumpkin:
- Attach Faux Flowers: Use hot glue to attach faux flowers around the pumpkin.
- Fill Gaps: Use greenery to fill in gaps for a fuller look.
Materials Needed:
- Pumpkin
- Faux flowers
- Hot glue gun
19. Thumbprint Ghost Pumpkin
Get the family involved with a thumbprint ghost pumpkin. This is a fun and interactive way to decorate.
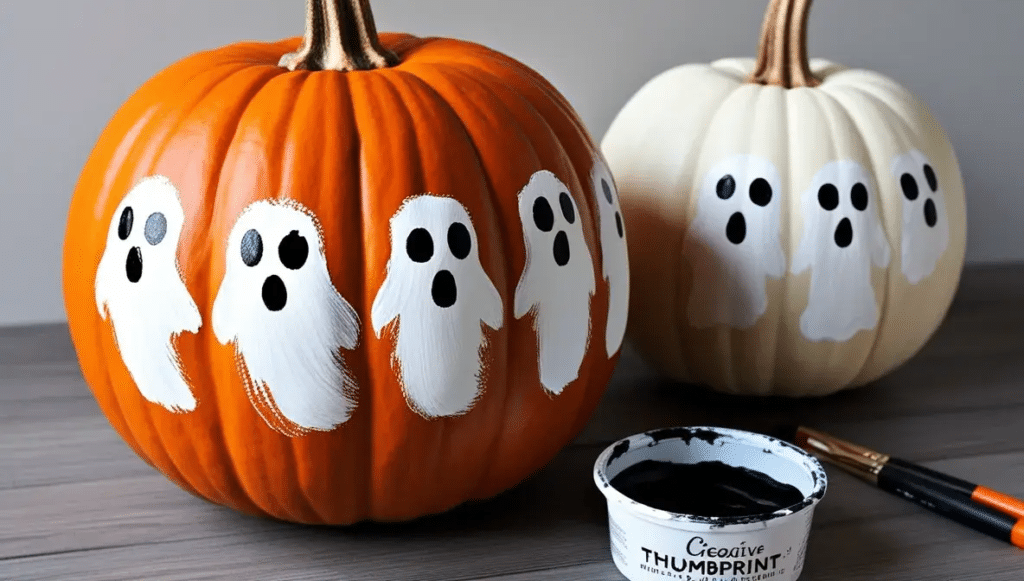
Steps to Create a Thumbprint Ghost Pumpkin:
- Paint the Pumpkin: Use a base color like orange or white.
- Add Ghosts: Dip thumbs in white paint and press them onto the pumpkin. Add eyes and mouths with black paint or marker.
Materials Needed:
- Pumpkin
- Paint
20. Decoupage Pumpkin
The decoupage technique allows for endless creativity and customization. It’s perfect for those who love crafting.
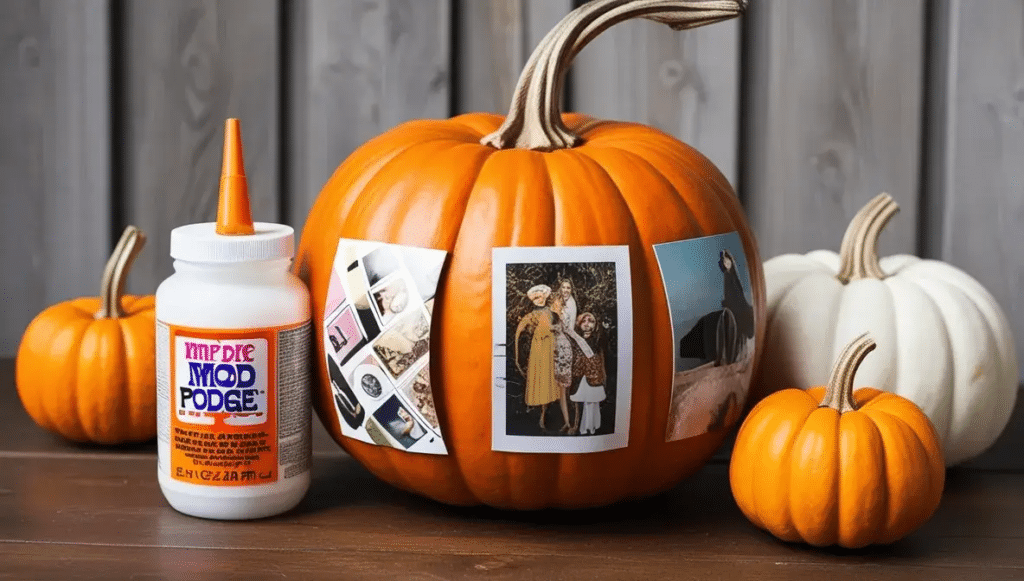
Steps to Create a Decoupage Pumpkin:
- Cut Out Images: Choose images from magazines or wrapping paper.
- Adhere with Mod Podge: Use Mod Podge to attach the cutouts to the pumpkin and seal the surface.
Materials Needed:
- Pumpkin
- Mod Podge
- Cut-out images
21. Pistachio Petal Pumpkin
Get creative and eco-friendly with a pistachio petal pumpkin.
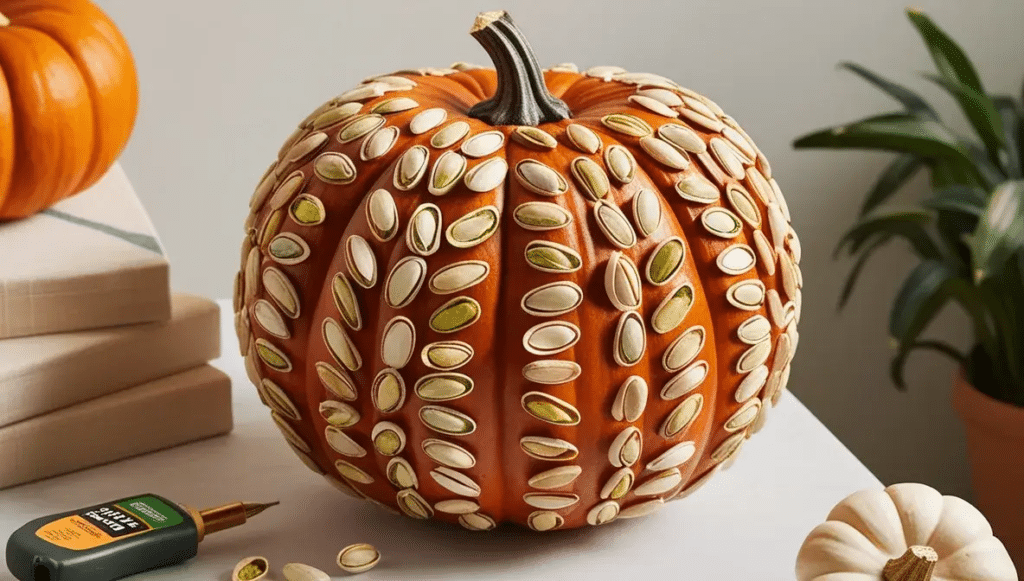
Steps to Create a Pistachio Petal Pumpkin:
- Attach Pistachio Shells: Use hot glue to attach pistachio shells around the pumpkin to create a petal effect.
- Paint: Optionally, paint the shells for added color.
Materials Needed:
- Pumpkin
- Pistachio shells
- Hot glue gun
22. Disney Princess Pumpkin
Celebrate your favorite Disney characters with a Disney Princess pumpkin.
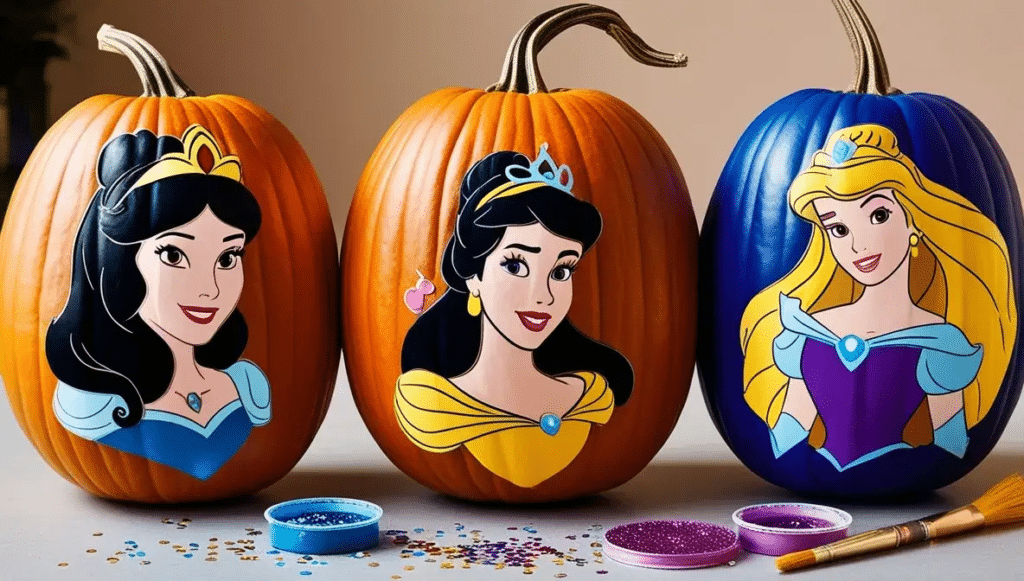
Steps to Create a Disney Princess Pumpkin:
- Choose a Character: Pick your favorite princess and plan your design.
- Paint and Decorate: Use paint, glitter, and embellishments to bring the character to life.
Materials Needed:
- Pumpkin
- Paint
- Decorations
23. Scarecrow Pumpkin
A scarecrow pumpkin adds a rustic charm to your fall decor.
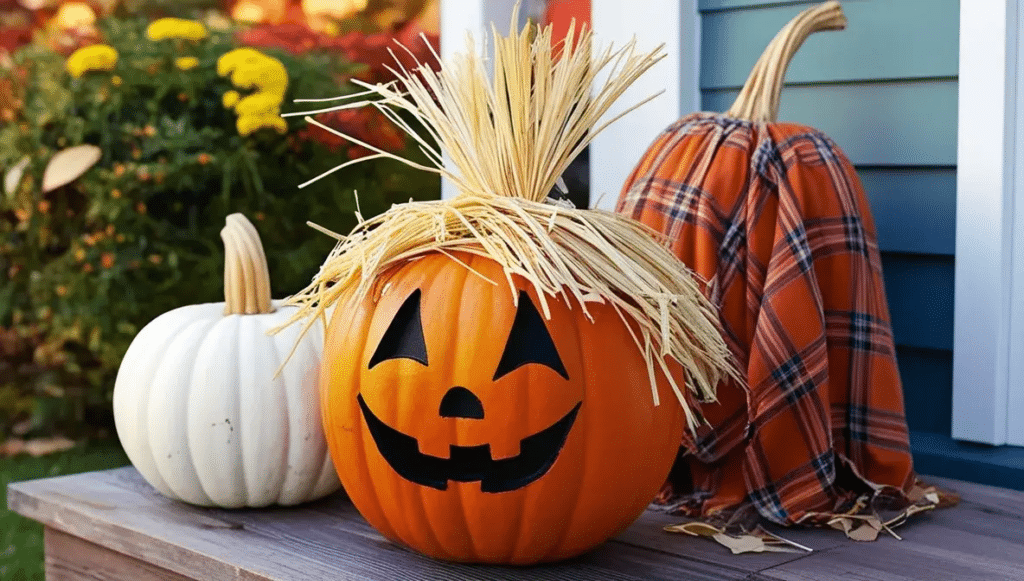
Steps to Create a Scarecrow Pumpkin:
- Paint the Pumpkin: Use bright colors to create a friendly face.
- Add Straw: Attach straw for hair and dress the pumpkin with fabric for a scarecrow effect.
Materials Needed:
- Pumpkin
- Paint
- Straw
- Fabric
24. Mickey Mouse Pumpkin with Ears
Bring Disney magic to your home with a Mickey Mouse pumpkin.
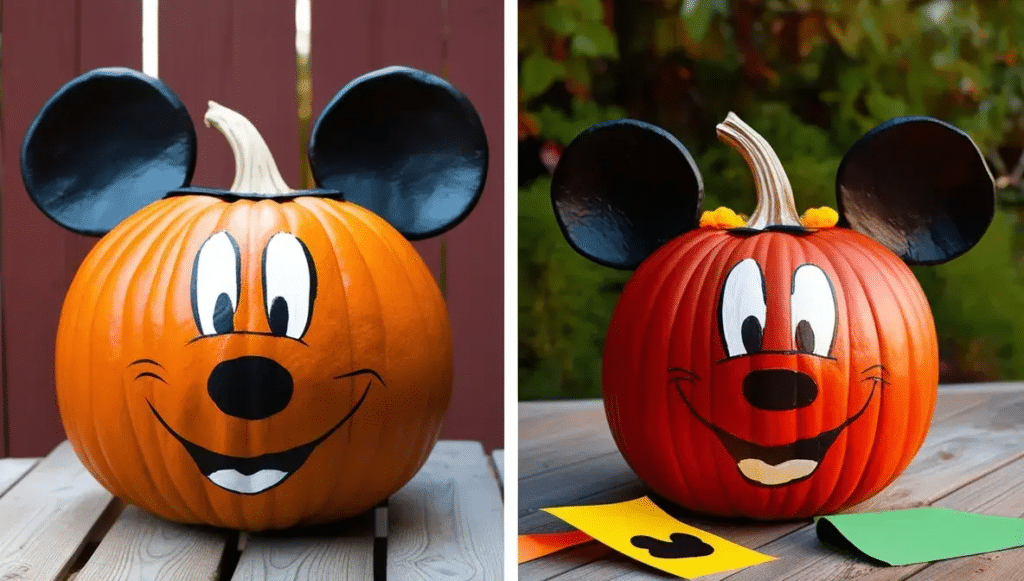
Steps to Create a Mickey Mouse Pumpkin:
- Paint the Pumpkin: Use red paint for the body and black for the ears.
- Add Details: Create Mickey’s face using paint and construction paper.
Materials Needed:
- Pumpkin
- Paint
- Construction paper
25. Unicorn Pumpkin
Every child loves a unicorn pumpkin! This design is colorful and whimsical.
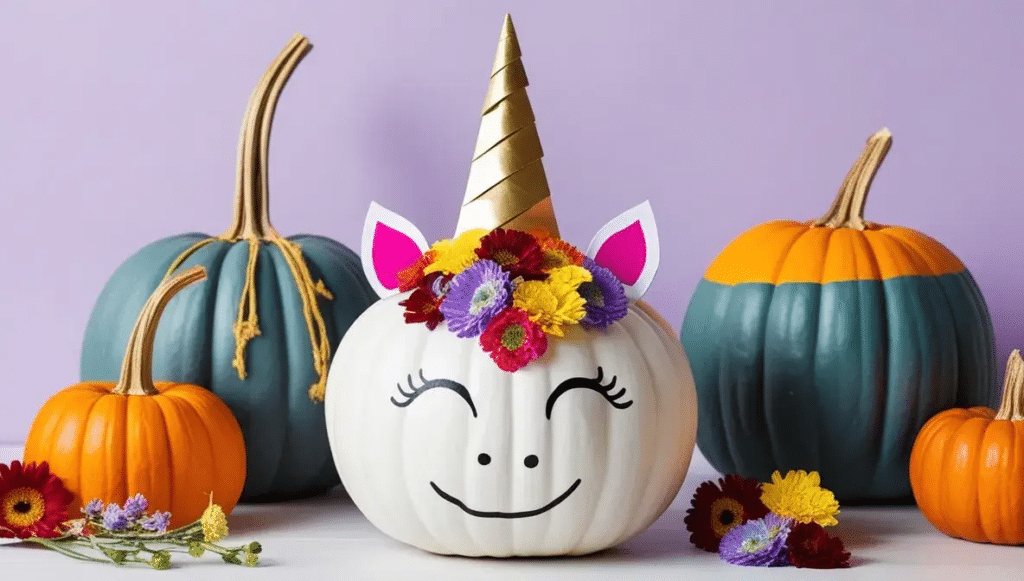
Steps to Create a Unicorn Pumpkin:
- Paint the Pumpkin: Use white paint as the base.
- Create the Horn: Make a cone from gold paper and attach it on top. Add colorful flowers for a magical touch.
Materials Needed:
- Pumpkin
- White paint
- Gold paper
- Flowers
26. Galaxy Pumpkin
Take your pumpkin decorating to the stars with a galaxy pumpkin.
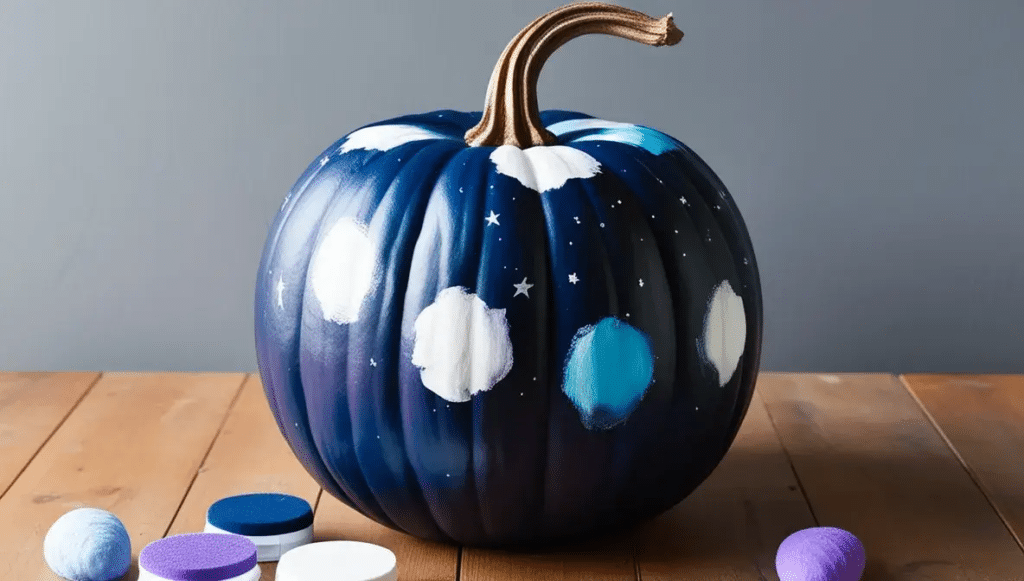
Steps to Create a Galaxy Pumpkin:
- Paint the Base: Use a dark base color like navy or black.
- Add Galaxy Effects: Use sponges to dab on white, blue, and purple paint, creating a starry effect.
Materials Needed:
- Pumpkin
- Dark paint
- Light colors for galaxy effects
27. Striped Pumpkin
For a classic look, try a striped pumpkin.
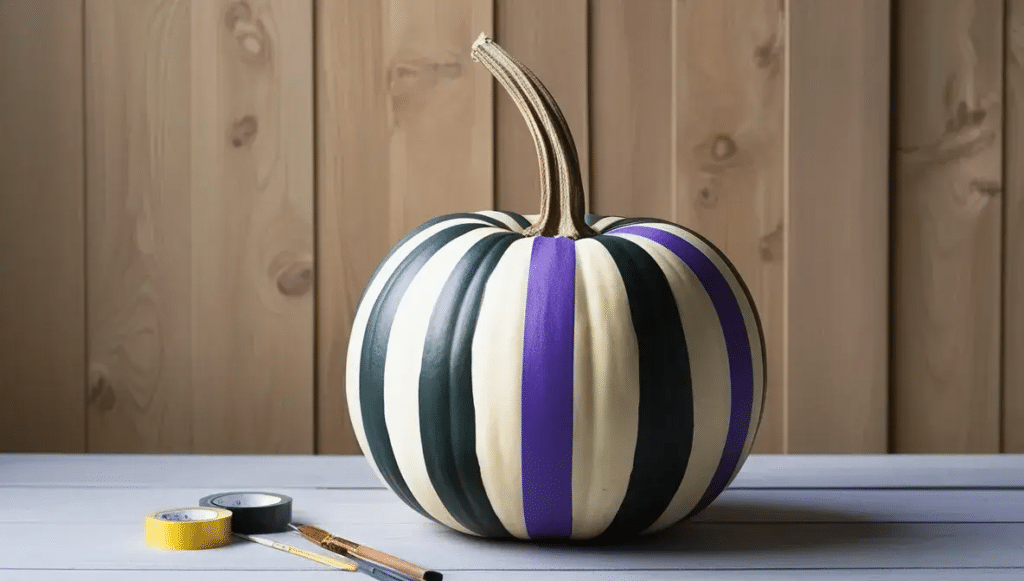
Steps to Create a Striped Pumpkin:
- Tape the Pumpkin: Use painters’ tape to create stripes.
- Paint: Choose your colors and paint between the tape. Remove the tape once dry for a crisp design.
Materials Needed:
- Pumpkin
- Painters’ tape
- Paint
28. Butterfly Pumpkin
Turn your pumpkin into a beautiful butterfly with this whimsical design.
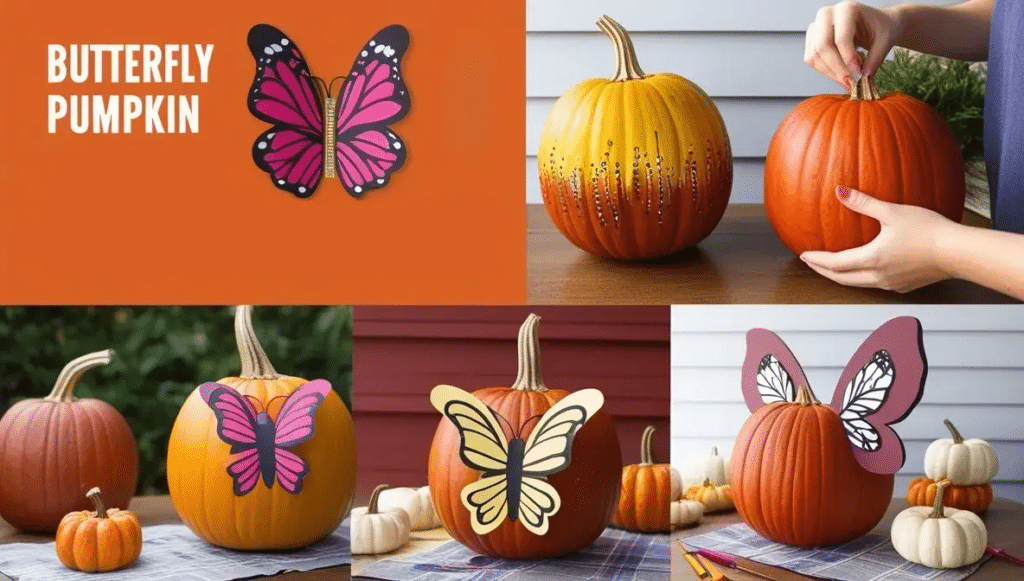
Steps to Create a Butterfly Pumpkin:
- Paint: Use bright colors for the base.
- Create Wings: Cut out wings from paper or felt and attach to the sides of the pumpkin.
Materials Needed:
- Pumpkin
- Paint
- Paper or felt for wings
29. Punk Pumpkin
Show off your edgy side with a punk pumpkin.
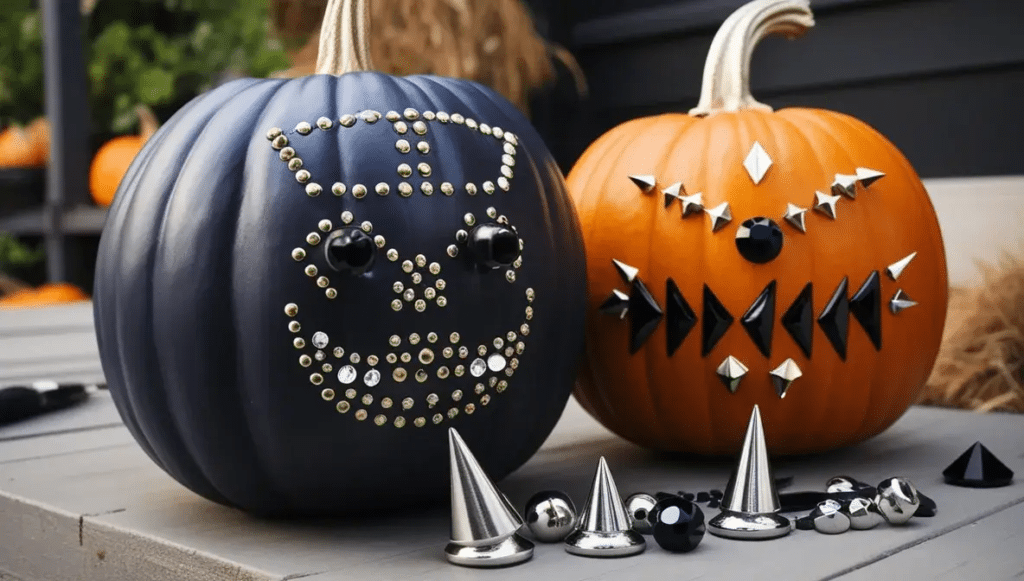
Steps to Create a Punk Pumpkin:
- Paint the Pumpkin: Use dark colors as a base.
- Add Accessories: Use studs, spikes, and other embellishments to create a punk vibe.
Materials Needed:
- Pumpkin
- Dark paint
- Studs and embellishments
30. Dried Flower Pumpkin
A dried flower pumpkin offers a natural and rustic look.
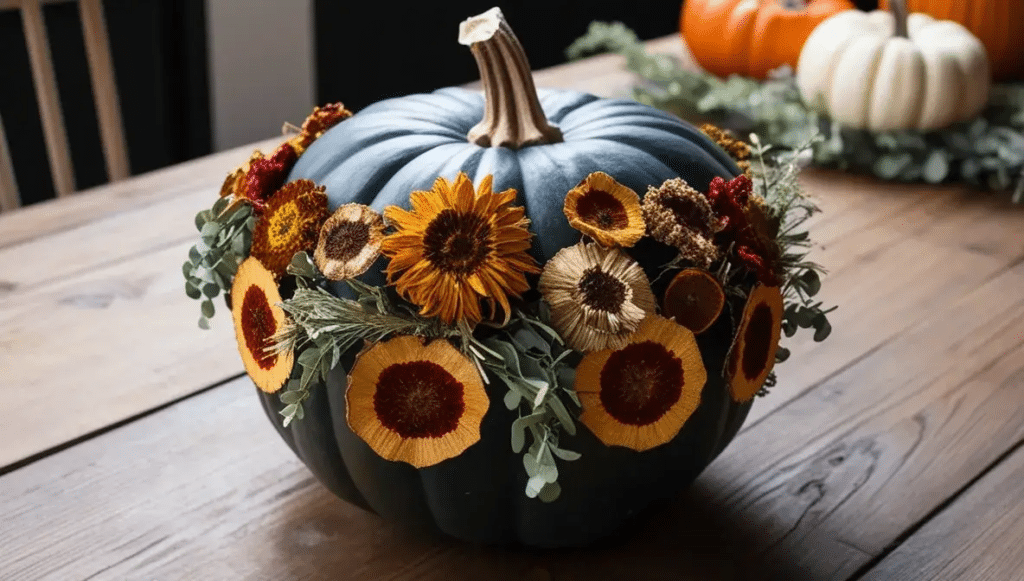
Steps to Create a Dried Flower Pumpkin:
- Attach Dried Flowers: Use hot glue to attach dried flowers around the pumpkin.
- Fill in Gaps: Use additional greenery for a fuller look.
Materials Needed:
- Pumpkin
- Dried flowers
- Hot glue gun
31. Vase Pumpkin
Transform your pumpkin into a vase for fresh flowers.
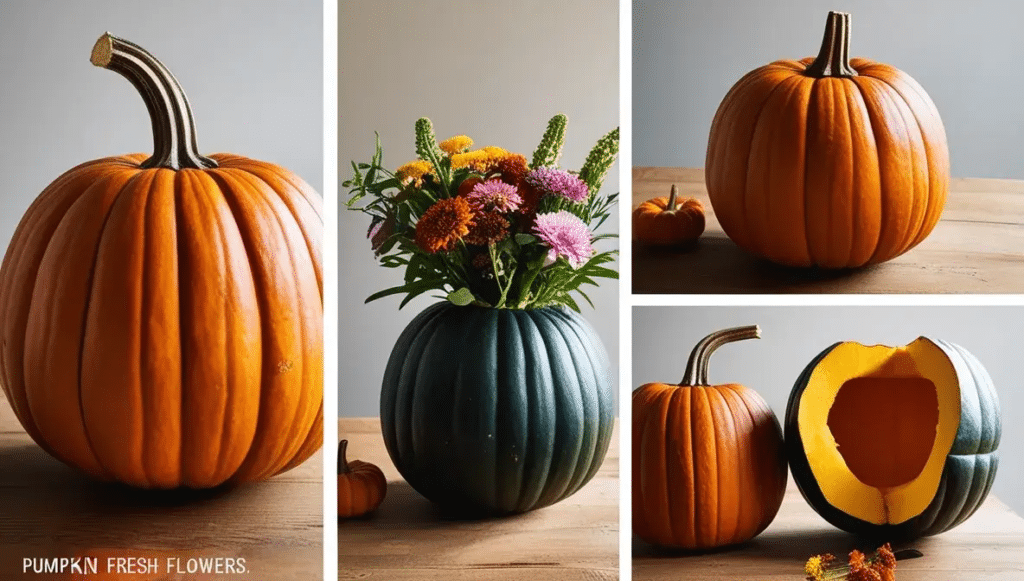
Steps to Create a Vase Pumpkin:
- Hollow Out the Pumpkin: Cut the top off and scoop the insides.
- Fill with Flowers: Add fresh flowers for a stunning centerpiece.
Materials Needed:
- Pumpkin
- Fresh flowers
32. Heart Pumpkin
Show your love with a heart pumpkin.
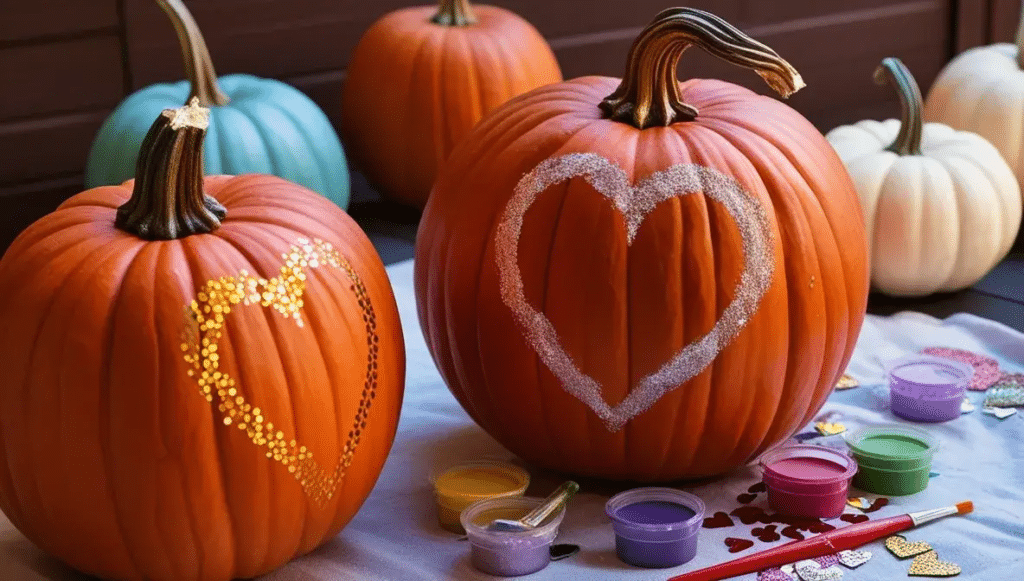
Steps to Create a Heart Pumpkin:
- Paint or Carve Hearts: Use paint or carving tools to create heart shapes.
- Decorate: Add additional decorations like glitter or stickers around the hearts.
Materials Needed:
- Pumpkin
- Paint or carving tools
33. Vinyl Pumpkin
Use a Cricut machine to create intricate vinyl designs.
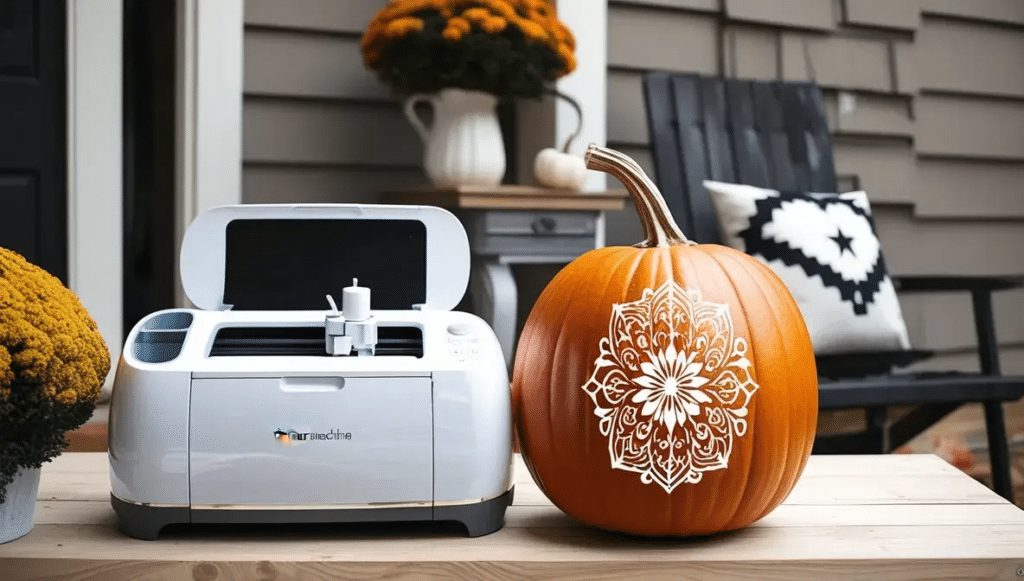
Steps to Create a Vinyl Pumpkin:
- Design Your Image: Create a design using your Cricut machine.
- Apply the Vinyl: Stick the design onto your pumpkin for a professional finish.
Materials Needed:
- Pumpkin
- Cricut machine
- Vinyl
34. Mr. Pumpkin Man
Bring to life a fun character with a Mr. Pumpkin Man design.

Steps to Create Mr. Pumpkin Man:
- Dress the Pumpkin: Use accessories like hats, scarves, and googly eyes to give your pumpkin personality.
- Create Features: Paint or glue on facial features.
Materials Needed:
- Pumpkin
- Accessories
35. Candy Bowl Pumpkin
Make a candy bowl pumpkin by hollowing out a pumpkin to hold Halloween treats.
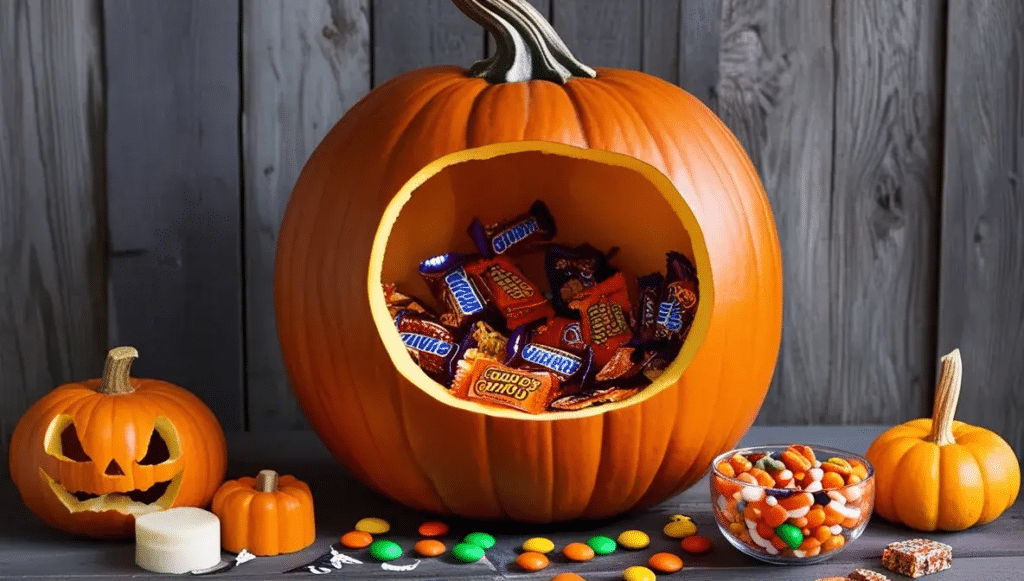
Steps to Create a Candy Bowl Pumpkin:
- Hollow Out the Pumpkin: Cut off the top and scoop out the insides.
- Fill with Candy: Decorate the outside and fill it with your favorite treats.
Materials Needed:
- Pumpkin
- Candy
36. Witty Pumpkin
Get creative with a witty pumpkin. Use puns or clever phrases for a humorous touch.
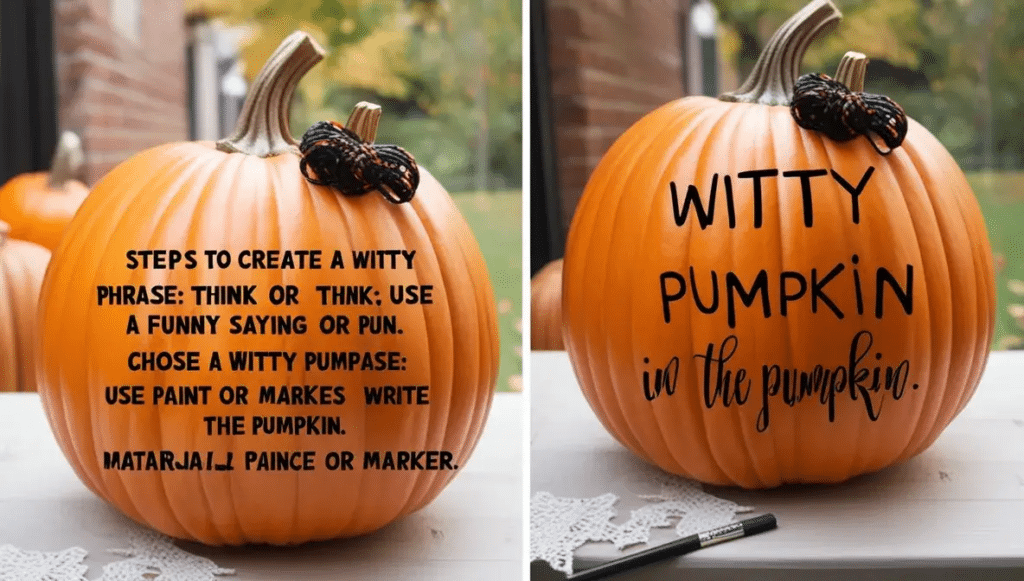
Steps to Create a Witty Pumpkin:
- Choose Your Phrase: Think of a funny saying or pun.
- Write or Paint: Use paint or markers to write your phrase on the pumpkin.
Materials Needed:
- Pumpkin
- Paint or markers
37. Red and Black Mickey Mouse Pumpkin
Celebrate Disney with a red and black Mickey Mouse pumpkin.
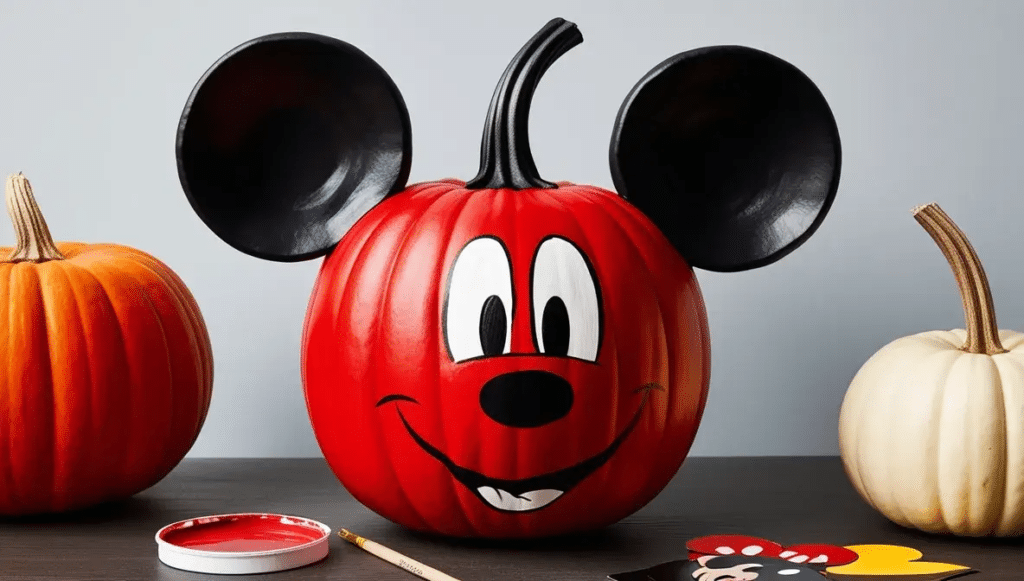
Steps to Create a Mickey Mouse Pumpkin:
- Paint the Pumpkin: Use red paint for the body and black for the ears.
- Add Features: Create Mickey’s face using paint and stickers.
Materials Needed:
- Pumpkin
- Paint
- Stickers
38. Garland Pumpkin
Create a garland pumpkin by stringing mini pumpkins together.
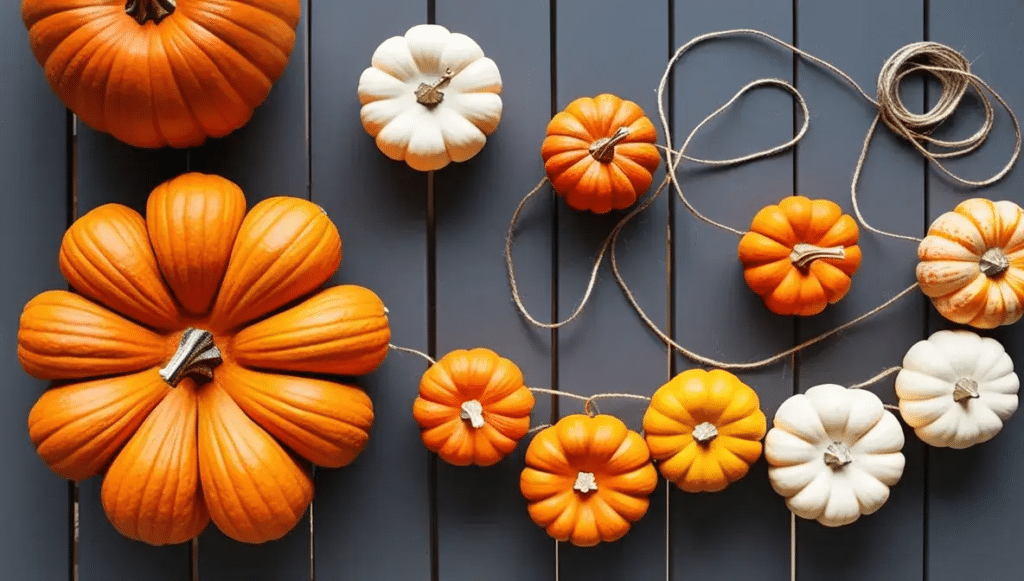
Steps to Create a Garland Pumpkin:
- Choose Mini Pumpkins: Select small pumpkins of different colors.
- String Together: Use twine or string to connect the pumpkins.
Materials Needed:
- Mini pumpkins
- Twine or string
39. Wool Wrapped Pumpkin
For a cozy look, try a wool-wrapped pumpkin.
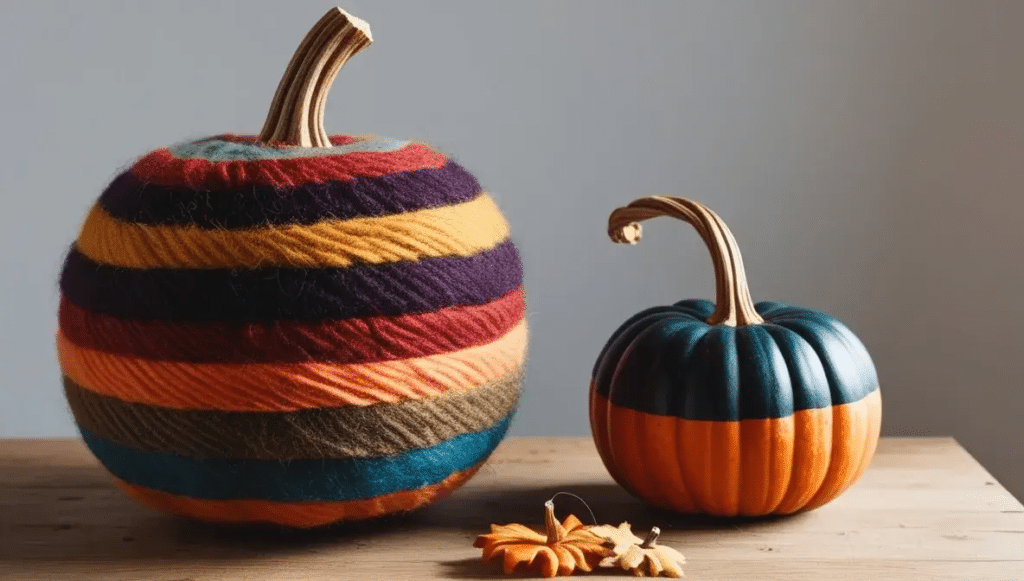
Steps to Create a Wool Wrapped Pumpkin:
- Wrap the Pumpkin: Use colorful wool to wrap around the pumpkin.
- Secure Ends: Use glue to secure the ends if necessary.
Materials Needed:
- Pumpkin
- Wool
40. Where the Wild Things Are Pumpkin
Bring literature to life with a Where the Wild Things Are pumpkin.
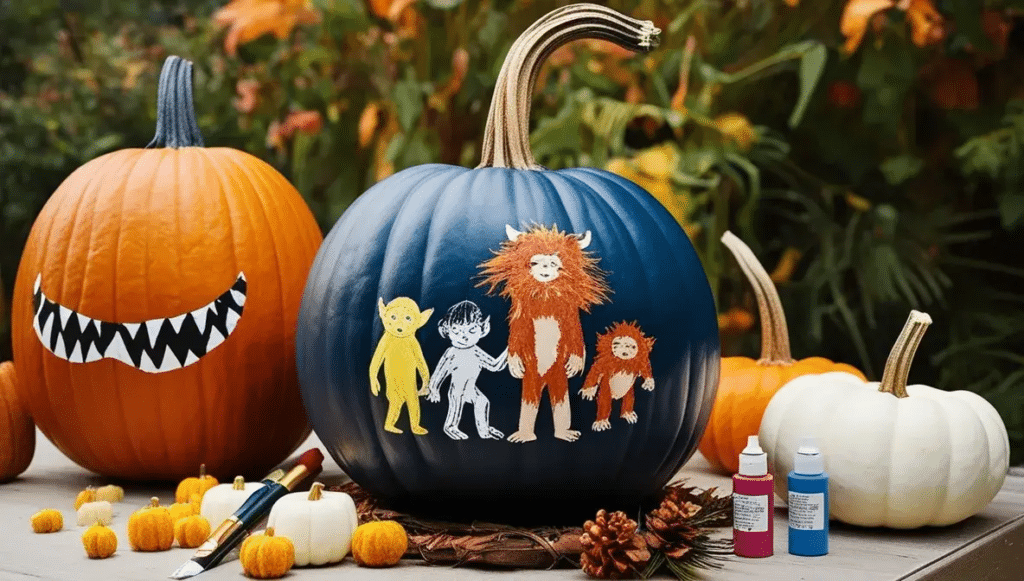
Steps to Create a Where the Wild Things Are Pumpkin:
- Paint Characters: Choose characters from the story and paint them on the pumpkin.
- Add Details: Use extra embellishments for texture and depth.
Materials Needed:
- Pumpkin
- Paint
- Decorations
41. Duct Tape Pumpkin
Get crafty with a duct tape pumpkin. This technique is easy and mess-free!
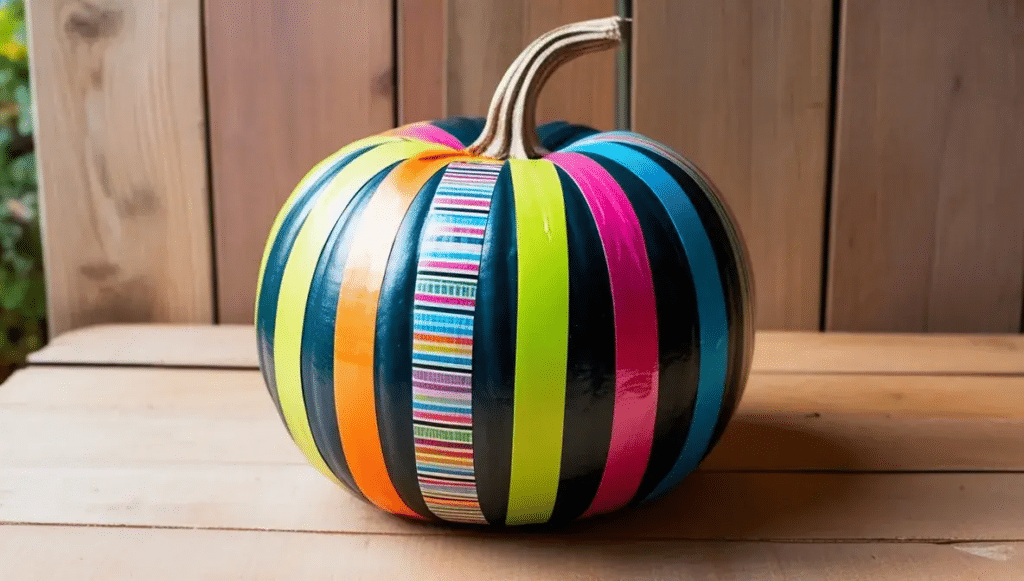
Steps to Create a Duct Tape Pumpkin:
- Choose Your Tape: Select colorful duct tape in various patterns or solid colors. This is a great way to add personality to your pumpkin.
- Apply Tape: Wrap the pumpkin in strips of duct tape, overlapping slightly to cover the surface completely. You can create patterns or simply use one color.
- Add Details: Use contrasting colors to create designs, such as stripes, polka dots, or even shapes.
Materials Needed:
- Pumpkin
- Colorful duct tape
42. Witch Pumpkin
Create a witch pumpkin to bring a little spookiness to your decor! This design captures the essence of Halloween while allowing for creativity.
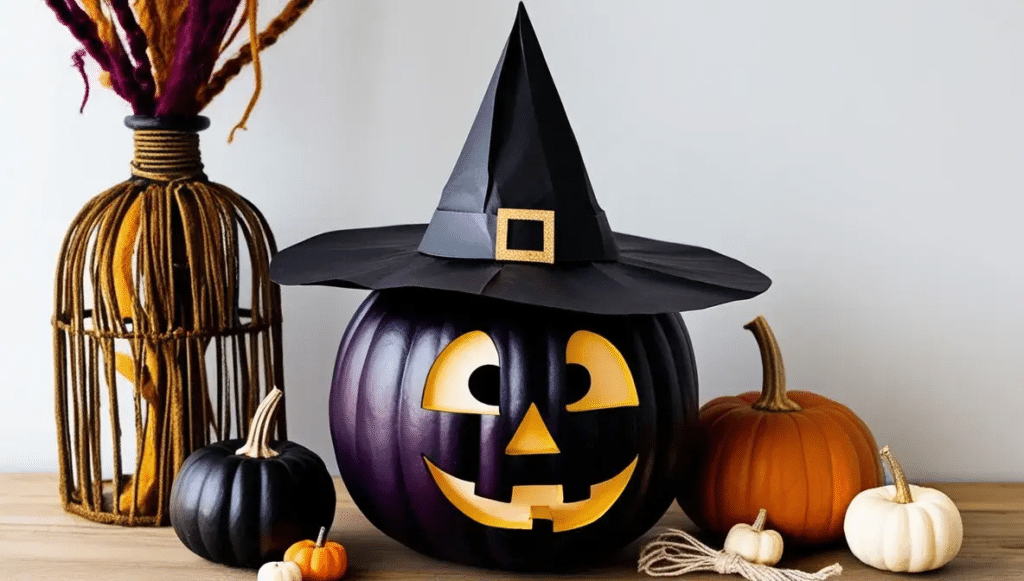
Steps to Create a Witch Pumpkin:
- Paint the Pumpkin: Start by painting the pumpkin black or a deep purple to give it a classic witch vibe.
- Add a Hat: Create a witch’s hat using black construction paper. Cut a large circle for the brim and a triangle for the hat. Attach it securely to the top of the pumpkin.
- Decorate the Face: Use paint or felt to create a whimsical or scary face. Add features like a crooked nose or wild hair made from yarn.
Materials Needed:
- Pumpkin
- Black paint
- Construction paper for the hat
- Felt or extra paint for facial features
43. Colorful Lettered Pumpkins
Get creative with colorful lettered pumpkins! This design allows for personalized messages that can brighten up your home.
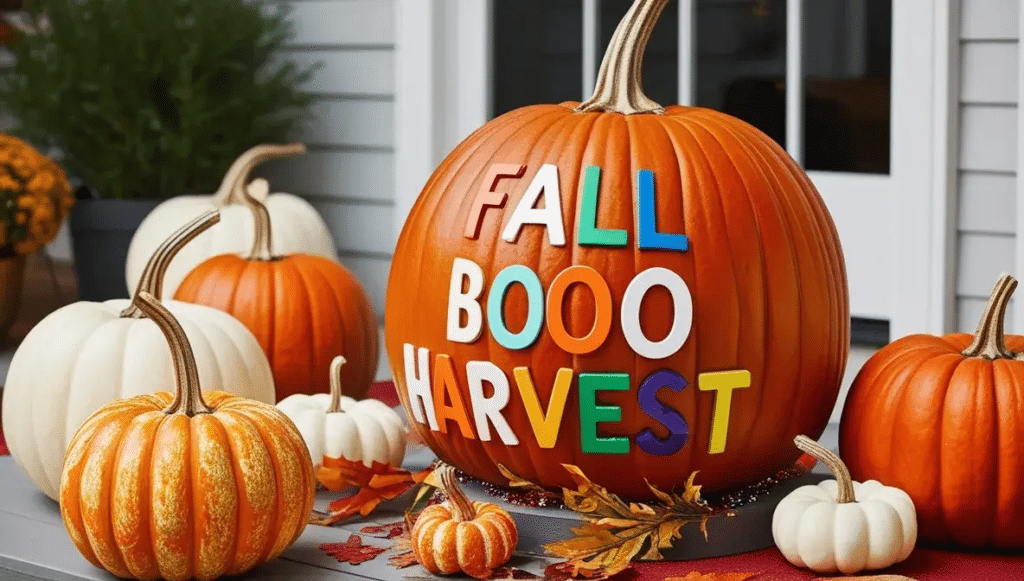
Steps to Create Colorful Lettered Pumpkins:
- Choose Your Words: Decide on a message or a series of words that resonate with the season, like “Fall,” “Boo,” or “Harvest.”
- Paint or Stick Letters: Use colorful paint or letter stickers to apply your message to the pumpkin. Ensure that the letters are large and easy to read.
- Add Decorative Elements: Consider adding other small decorations, like leaves or glitter, around the letters for extra flair.
Materials Needed:
- Pumpkin
- Paint or letter stickers
- Additional decorations (glitter, leaves)
44. Hedgehog Pumpkin
Make a charming hedgehog pumpkin that’s perfect for all ages. This design is simple and adorable.
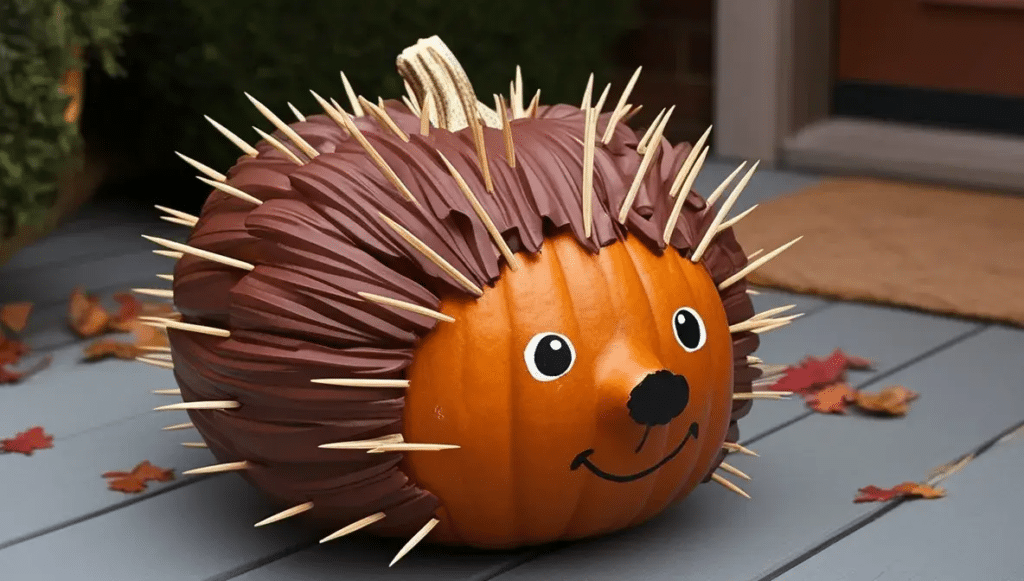
Steps to Create a Hedgehog Pumpkin:
- Paint the Pumpkin: Use brown paint as the base color for your pumpkin to mimic a hedgehog’s fur.
- Add Spikes: Use toothpicks or dried pasta for the spikes. Insert them into the pumpkin to create a hedgehog effect.
- Create Facial Features: Use felt or paint to create eyes and a nose. A little smile can make your hedgehog look friendly!
Materials Needed:
- Pumpkin
- Brown paint
- Toothpicks or dried pasta
- Felt or paint for facial features
45. Frankenstein Pumpkin
Celebrate Halloween with a classic Frankenstein pumpkin. This design is fun for both kids and adults.
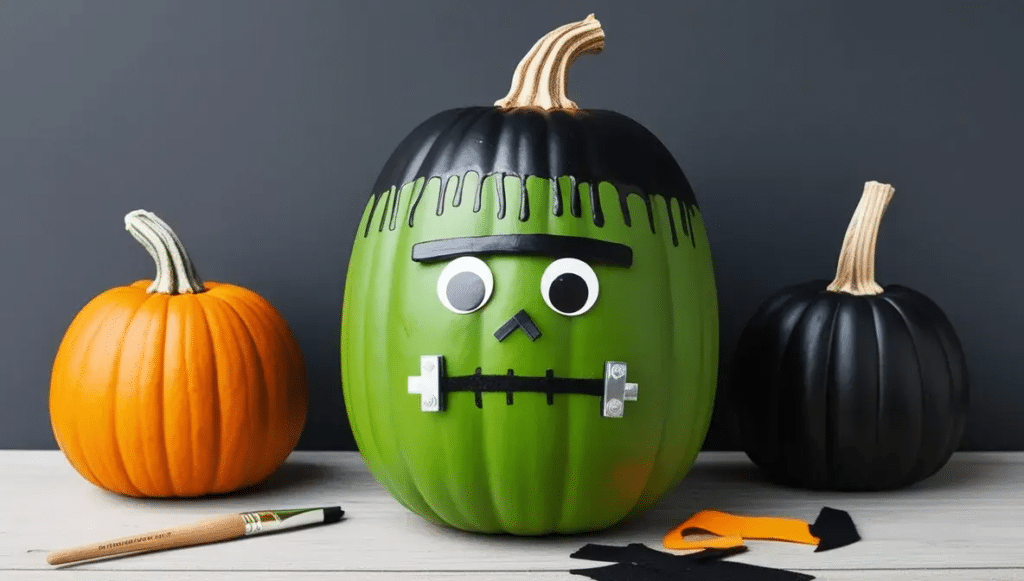
Steps to Create a Frankenstein Pumpkin:
- Paint the Base: Start by painting the pumpkin a vibrant green to resemble Frankenstein’s skin.
- Add Features: Use black paint to create his hair, stitches, and bolts. You can also glue on googly eyes for a playful touch.
- Add Details: Use felt or construction paper for additional features, such as a neck bolt or scars.
Materials Needed:
- Pumpkin
- Green and black paint
- Googly eyes
- Felt or construction paper
46. Chalk Paint Pumpkin
Use chalk paint for a rustic and matte finish on your pumpkin. This technique allows for easy customization each year.
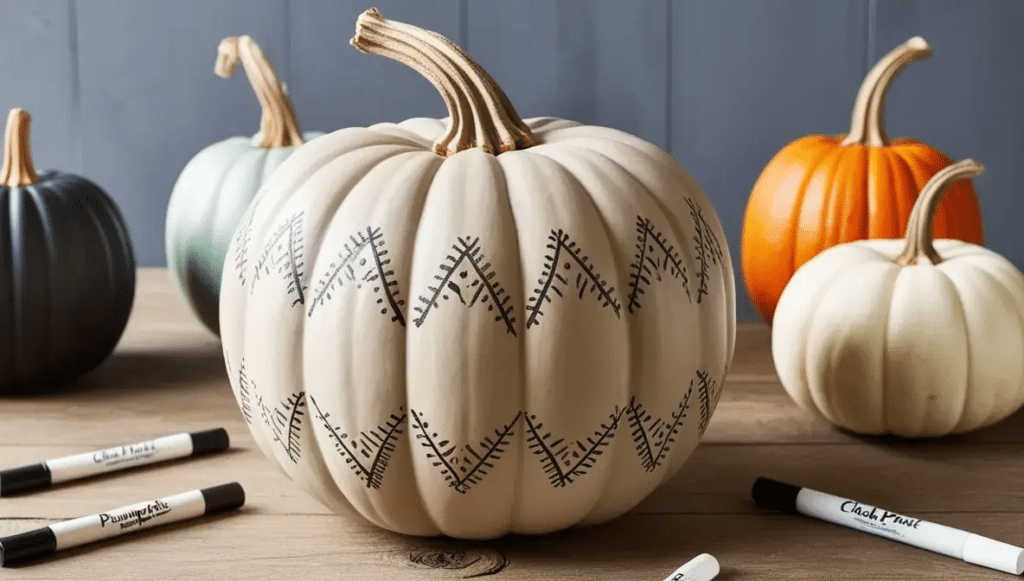
Steps to Create a Chalk Paint Pumpkin:
- Apply Chalk Paint: Choose a color for the base and apply chalk paint to the pumpkin. The matte finish gives it a charming look.
- Add Designs: Use chalk markers to draw patterns, messages, or seasonal designs. The beauty of chalk paint is that it can be easily wiped off and redone.
- Seal If Desired: If you want to keep your designs for the season, consider sealing the chalk with a clear spray.
Materials Needed:
- Pumpkin
- Chalk paint
- Chalk markers
47. Glitter Owl Pumpkin
Create a sparkly glitter owl pumpkin that’s perfect for adding a whimsical touch to your fall decor.
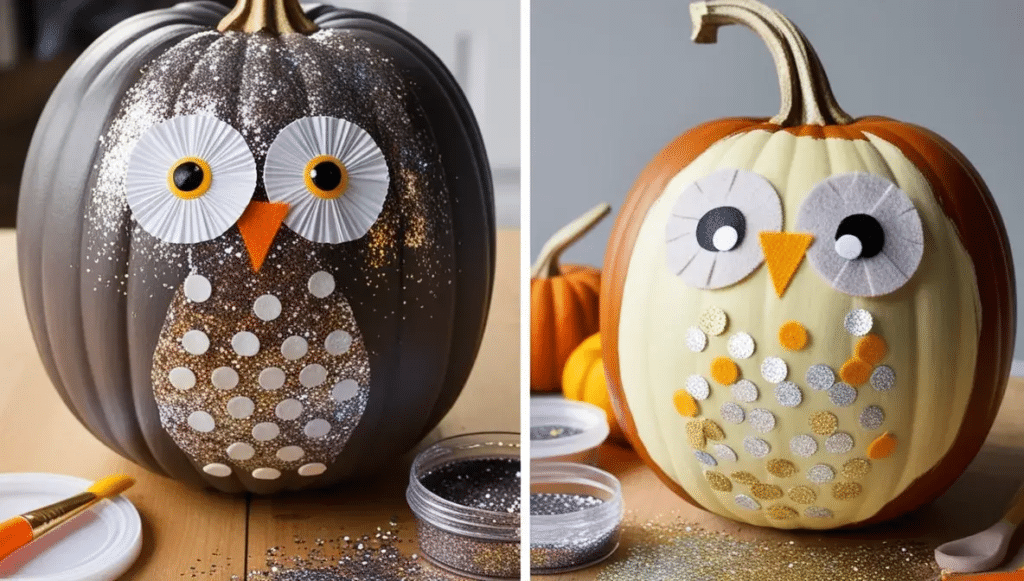
Steps to Create a Glitter Owl Pumpkin:
- Paint the Base: Choose a base color such as brown or gray and paint the pumpkin.
- Add Glitter: While the paint is still wet, sprinkle glitter over the pumpkin. You can use multiple colors for a more festive look.
- Create Owl Features: Use felt or paper to make eyes, wings, and a beak. Glue them onto the pumpkin to complete your owl.
Materials Needed:
- Pumpkin
- Paint
- Glitter
- Felt or paper for features
48. Balloon Dipped Pumpkin
For a unique design, try a balloon dipped pumpkin. This technique is fun and creates interesting patterns.
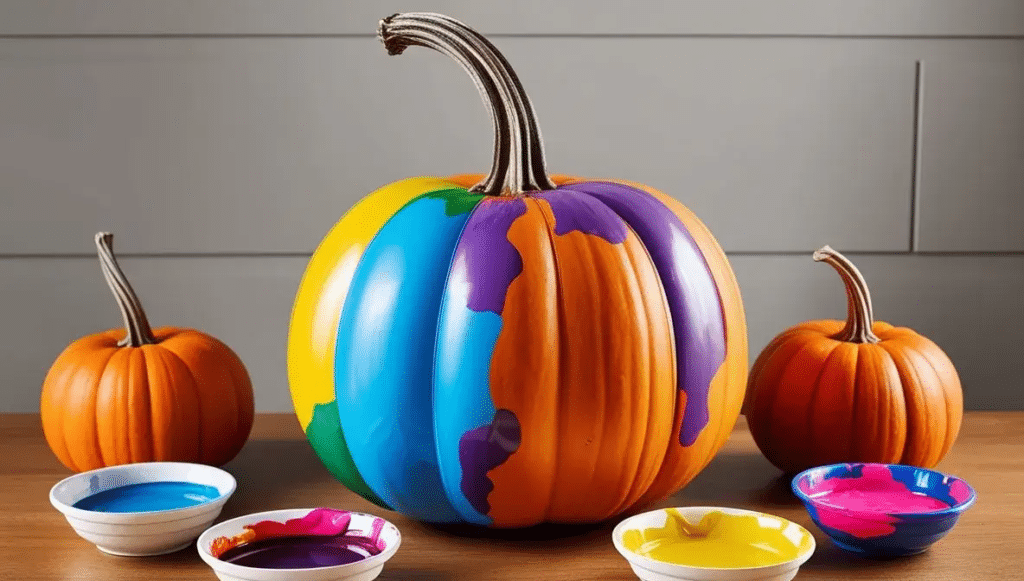
Steps to Create a Balloon Dipped Pumpkin:
- Prepare Paint: Choose your paint colors and pour them into shallow containers.
- Dip Balloons: Inflate small balloons and dip them into the paint. Then, press the balloon onto the pumpkin to create a fun pattern.
- Mix Colors: Use different balloons and colors for a vibrant, multi-colored pumpkin.
Materials Needed:
- Pumpkin
- Balloons
- Various paint colors
49. Glasses Pumpkin
Add some personality with a glasses pumpkin. This design is simple yet effective.
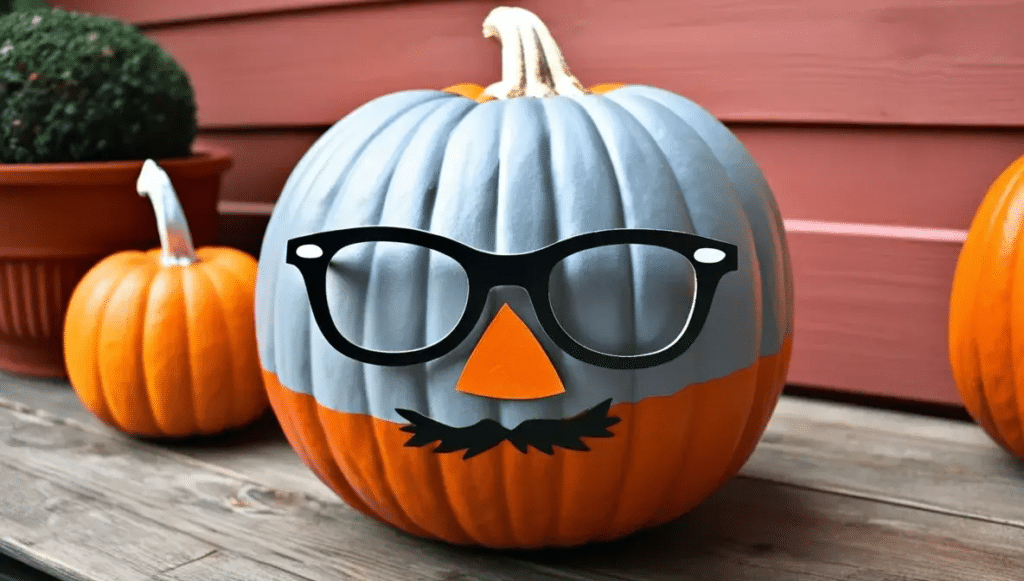
Steps to Create a Glasses Pumpkin:
- Paint the Pumpkin: Choose a base color for your pumpkin.
- Add Glasses: You can use plastic glasses or make glasses out of black construction paper. Attach them to the pumpkin using glue.
- Create a Face: Paint or use stickers to add eyes and a mouth for extra character.
Materials Needed:
- Pumpkin
- Paint
- Plastic glasses or construction paper
50. Woodland Creature Pumpkin
Turn your pumpkin into a cute woodland creature like a fox or a deer.
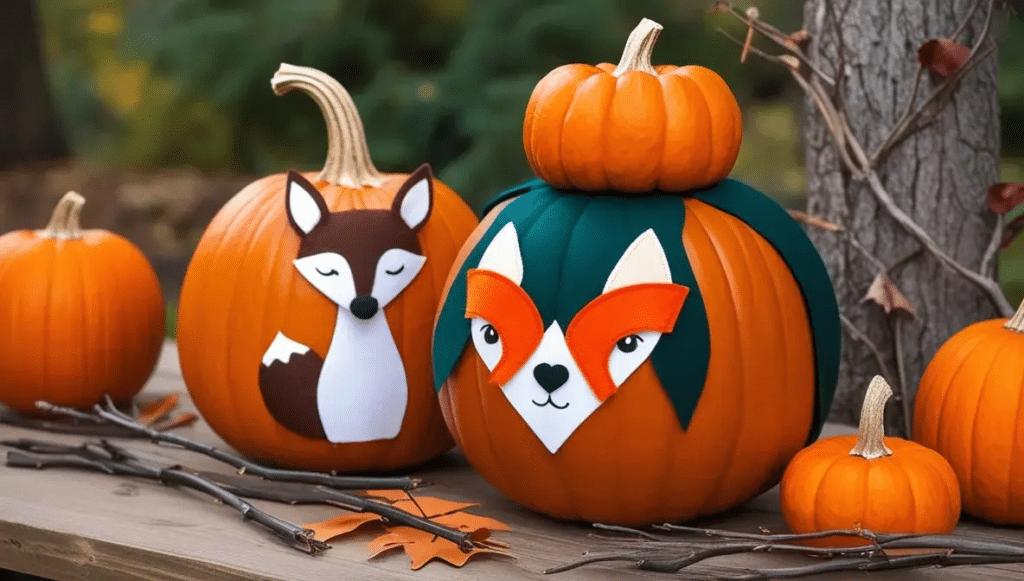
Steps to Create a Woodland Creature Pumpkin:
- Choose Your Animal: Decide which woodland creature you want to create.
- Paint and Decorate: Use paint to give your pumpkin the base color of your chosen animal. Add features using felt or other materials.
- Finish with Details: Use twigs or leaves to enhance the natural look of your woodland creature.
Materials Needed:
- Pumpkin
- Paint
- Felt or other decorating materials
Conclusion
From no-carve pumpkin designs to intricate DIY craft ideas, the possibilities for Pumpkin Decorating are endless! Whether you choose to go spooky or sweet, these 50 ideas will inspire you to create beautiful decor that celebrates the autumn season. Don’t forget to involve family and friends in the decorating process—after all, crafting together is one of the best parts of the fall festivites.
By trying out these designs, you not only enhance your home’s decor but also create lasting memories. Gather your supplies, unleash your creativity, and let your pumpkins shine this year! Happy decorating!

Max William, the expert behind Home Fabo, specializes in home decorating, blending creativity with practical design solutions. With years of experience in transforming spaces, Max shares innovative tips, stylish ideas, and DIY techniques to help readers elevate their homes with ease and elegance.